Today, I’ll be showing you how to transfer Nintendo Switch screenshots and videos from your Nintendo Switch console to your computer.
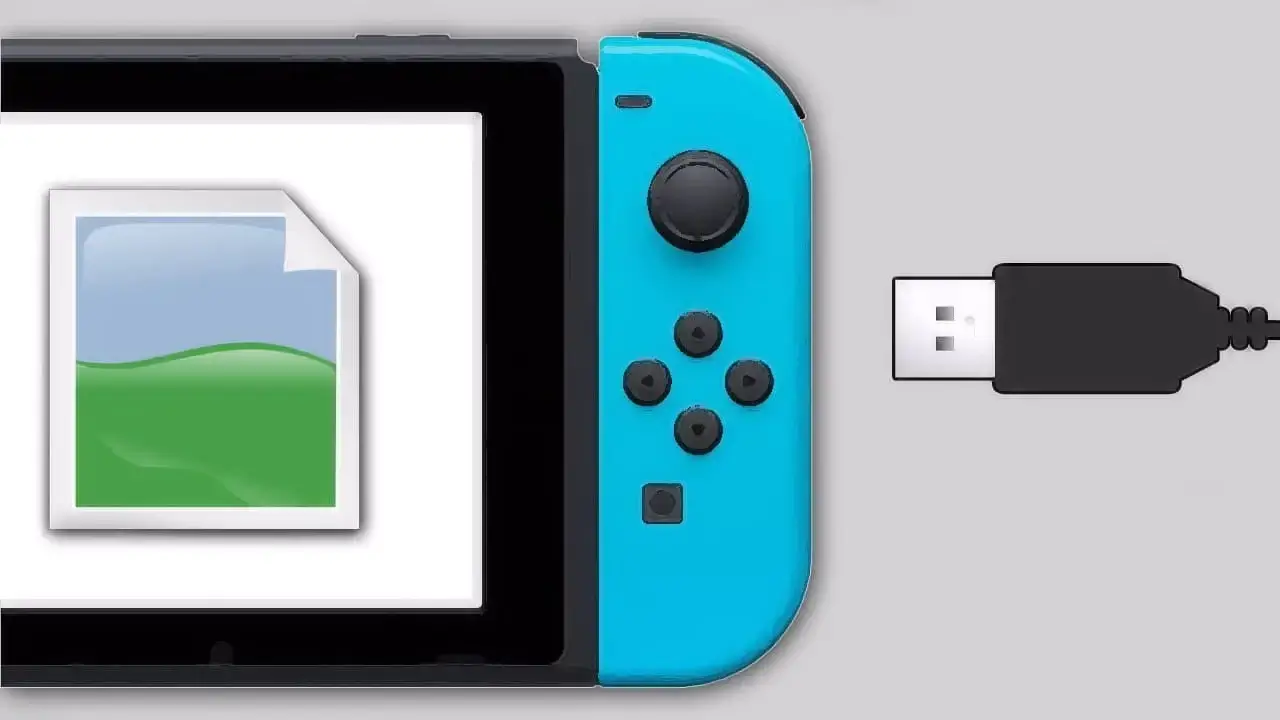
Update your Nintendo Switch to system version 11.0.0 or greater, connect your Nintendo Switch to a PC with a USB-C to USB cable, navigate to the Nintendo Switch folder, and drag-and-drop your most precious Nintendo Switch media over to your computer. It’s that simple!
However, there are additional important steps and specifics you must understand before beginning.
I’m here to walk you step-by-step through the process of transferring your Nintendo Switch media via pictures and easy-to-follow steps.
But first, what are Nintendo Switch media files and why would you want to transfer them to a computer?
If you are interested in checking out the most popular Nintendo Switch games everyone’s playing, you can find them by clicking here.
What are Nintendo Switch media files?
Nintendo Switch media files are screenshots and videos created upon using the Nintendo Switch Capture Button (for compatible games only).
These files (once taken) are saved to the Nintendo Switch’s internal storage or expandable microSD memory card storage.
- Screenshots can be taken by pressing the Nintendo Switch Capture Button at any time during gameplay.
- Videos can be taken by pressing and holding the Capture Button for a couple of seconds at any time during gameplay. Videos record the previous 30 seconds of footage.
Both file types can be transferred to a computer by using the Nintendo Switch USB method of media transfer outlined in this guide.
Why transfer Nintendo Switch Screenshots and Videos to a computer?
There are 3 main reasons why you would want to transfer your Nintendo Switch screenshots and videos to a computer:
- To free-up space on your Nintendo Switch
- To back-up your screenshots and videos
- To share and use in a variety of ways
To free-up space on your Nintendo Switch
Nintendo Switch media content can take up a lot of storage space over time.
Transferring them to your computer and then deleting them from your Nintendo Switch storage will free-up precious digital space.
To back-up your screenshots and videos
Transferring media content to a computer allows you to make back-up copies of precious Nintendo Switch screenshots and videos.
This is a great habit to practice in case something ever happens to your Nintendo Switch or if the Nintendo Switch’s memory becomes corrupt.
To share and use in a variety of ways
Transferring your Nintendo Switch media allows you to use the screenshots and videos in a variety of other ways:
- share them on social media
- share them on websites
- share them on forums
- email them to friends and family
- use screenshots for YouTube thumbnails
- create collages or personal printouts
- and more!
You are now ready to transfer Nintendo Switch screenshots and videos to a computer using the USB method.
Let’s get started!
How To Transfer Nintendo Switch Screenshots and Videos To PC (USB Method): Step-By-Step

Before we begin the transfer process, there are few things you need to know:
- Make sure your Nintendo Switch battery is charged
- This method can only be done in Handheld or Tabletop Modes as it requires the use of the USB-C port
- This method requires the use of a USB charging cable that supports data transfer
- Your Nintendo Switch must be updated to Version 11.0.0 or greater
A) Charge Your Battery
Charge your Nintendo Switch beforehand. You won’t be able to charge and transfer at the same time as both require Nintendo Switch’s charging port.
B) Handheld Or Tabletop Mode Only
You cannot perform the USB method of media transfer while the Nintendo Switch is docked.
Media transfer requires the Nintendo Switch’s USB-C charging port.
C) Acquire Appropriate Cable
Obtain a compatible USB-C cable that allows data transfer.
“A USB charging cable [model HAC-010] or a USB-IF certified USB cable that supports data transfer is required to connect to a computer” is the type of cable you will need, according to Nintendo’s update notes.
Most USB-C chargers included with smartphones support data transfer and should work.
One end of the cable will plug into the Nintendo Switch’s charging port while the other will connect to your computer.
D) Update Your Nintendo Switch
Nintendo Switch system version 11.0.0 added the USB method of media transfer:
Nintendo Switch system version 11.0.0 is required for the USB method to work. Update your Nintendo Switch before starting.
If you need help updating your Nintendo Switch, check out this step-by-step picture guide I created, How To Update Your Nintendo Switch and Nintendo Switch Lite.
Come back here when you are ready to transfer your files.
*I will be using the Nintendo Switch Joy-Con controllers and Grip for this method*
►Step 1 – Get Your Cable And PC Ready
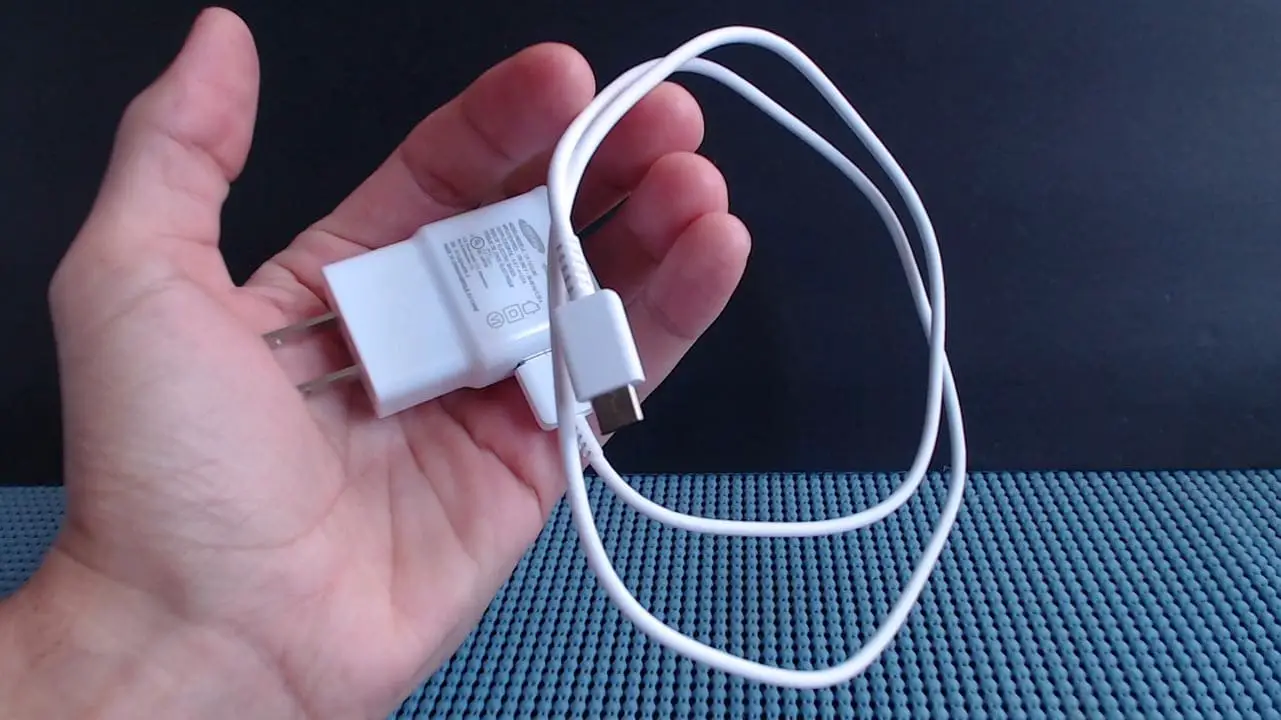
Select a compatible USB-C to USB cable that allows data transfer.
I used the smartphone travel adapter charger that came with my Samsung Galaxy A01 (Model: EP-TA12JWE) with USB-C to USB connectors.
Computer:
Turn on your computer.
Make sure the battery is charged (if using a laptop) or the computer is connected to a power outlet.
Navigate to the computer’s desktop.
Nintendo Switch:
Turn on your Nintendo Switch and head to the Home Menu.
►Step 2 – System Settings
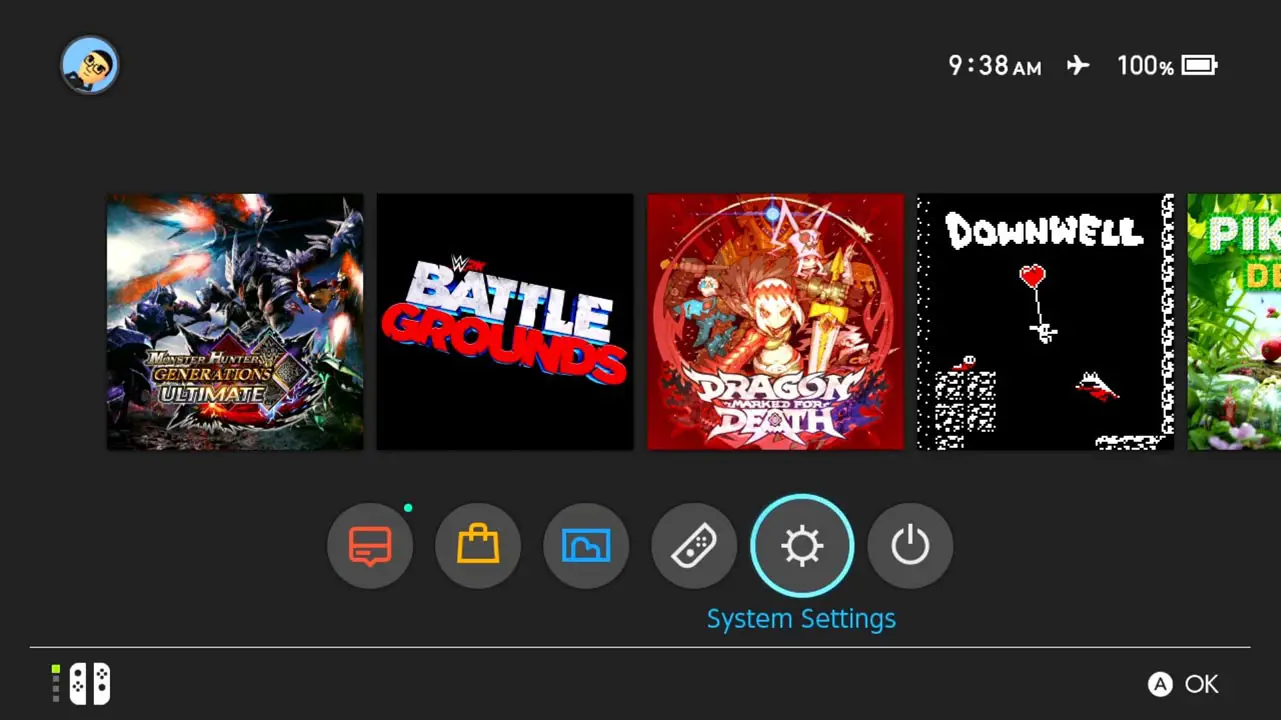
Nintendo Switch:
Highlight System Settings (the cog wheel on the bottom row) from your Nintendo Switch Home Menu.
Press the A button to confirm.
You will be taken to the System Settings screen.
►Step 3 – Data Management
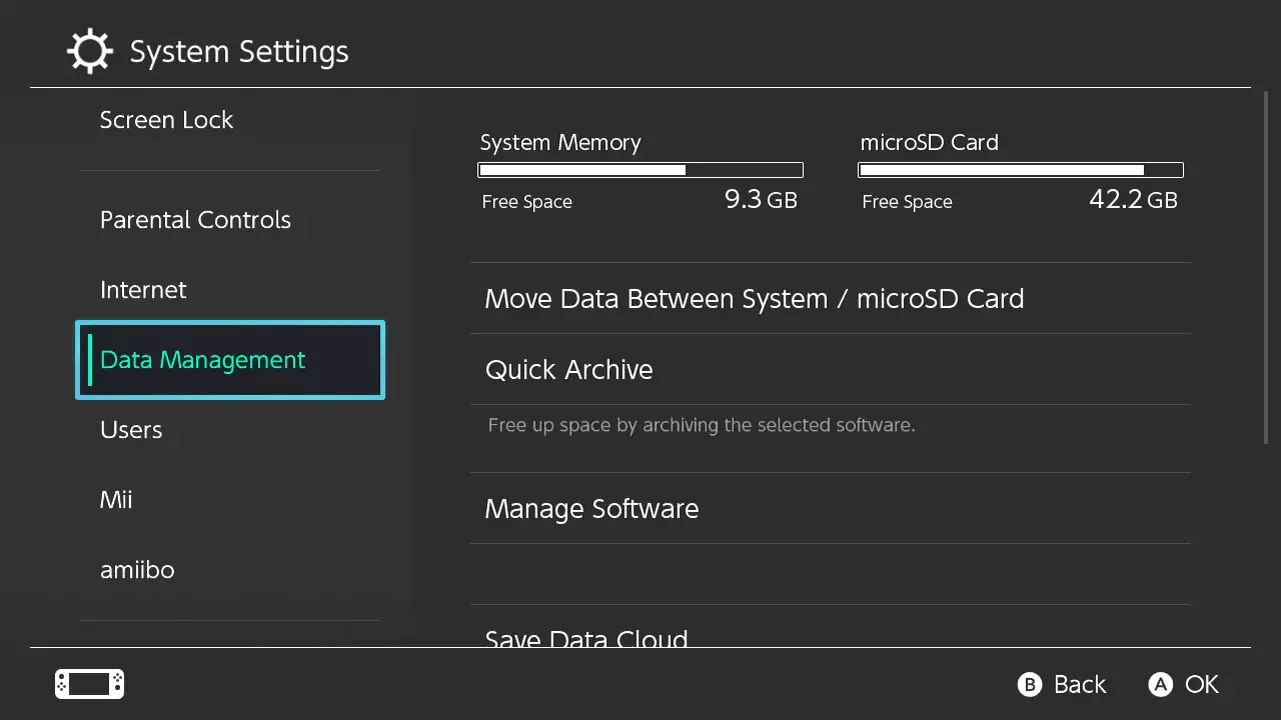
Nintendo Switch:
Scroll down the list of options by using the direction down button or analog sticks until you reach Data Management.
►Step 4 – Manage Screenshots and Videos
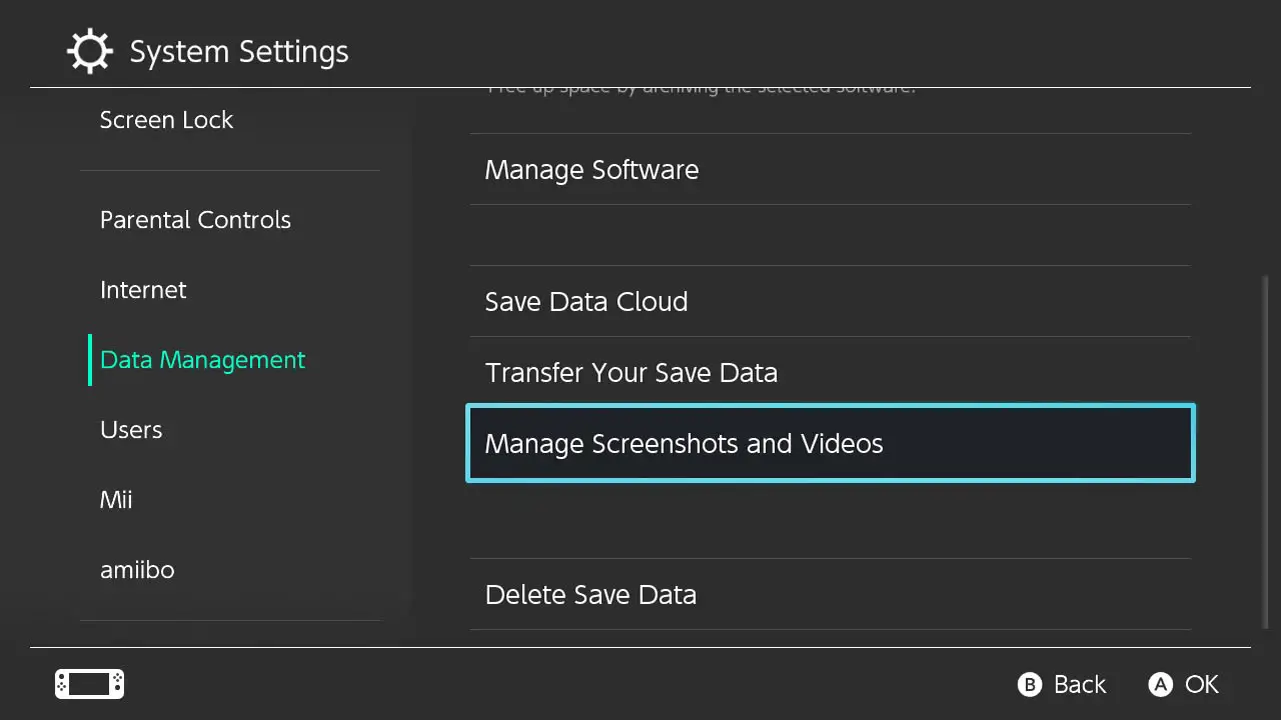
Nintendo Switch:
Press the direction right button or right on your analog stick and navigate to Manage Screenshots and Videos.
Press the A button to confirm.
You will be taken to the Manage Screenshots and Videos screen.
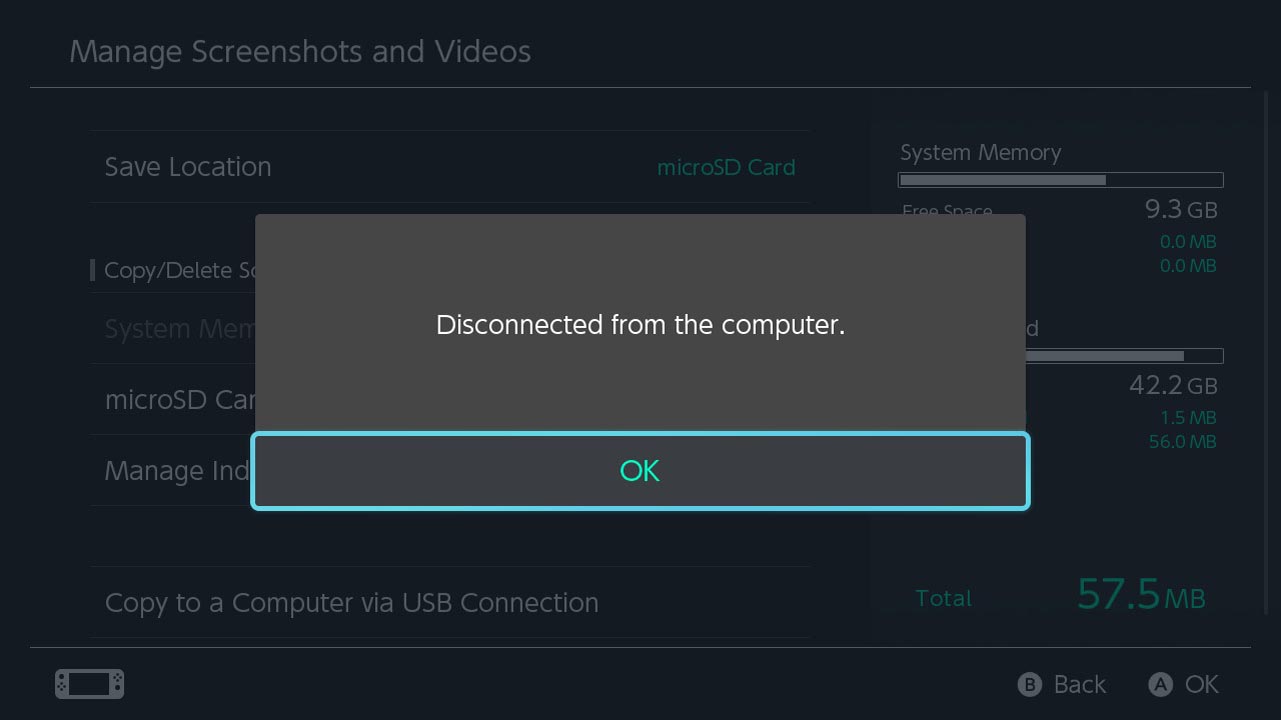
►Step 5 – Copy To A Computer Via USB Connection
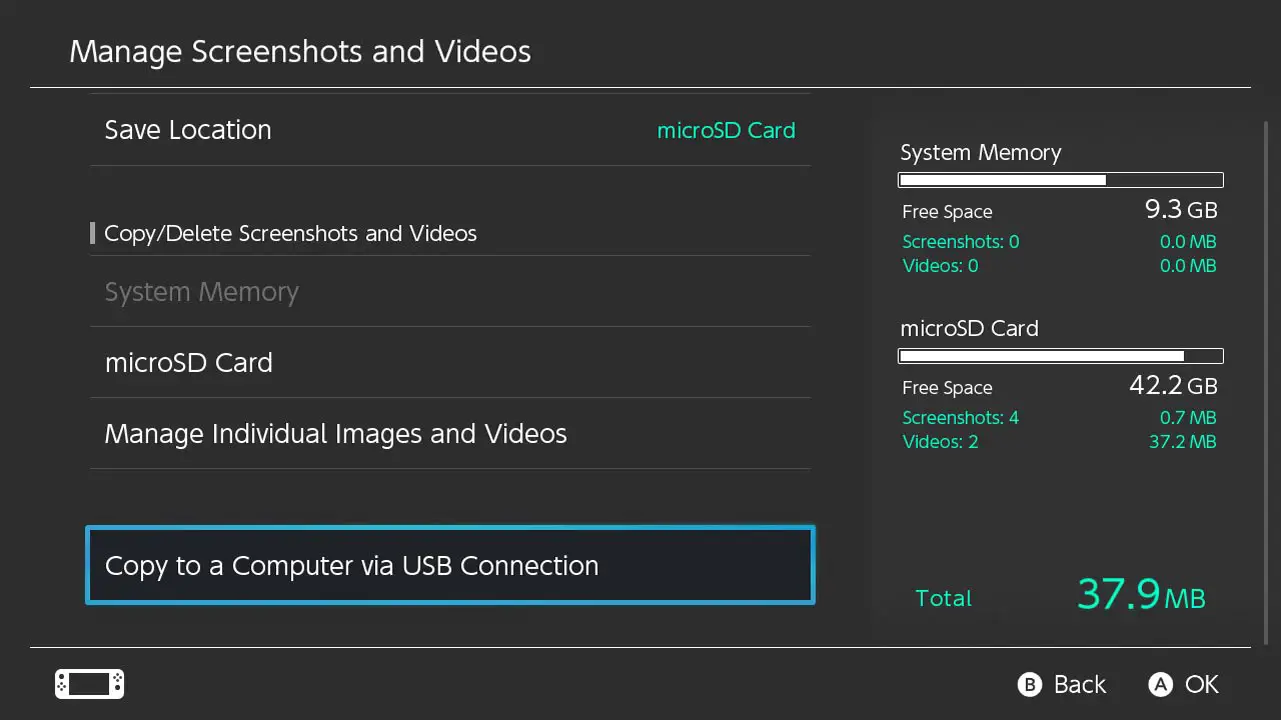
Nintendo Switch:
Scroll down to the Copy to a Computer via USB Connection option with your analog stick or direction down button.
Press the A button to confirm.
A message will appear on your Nintendo Switch screen.
►Step 6 – Connect Nintendo Switch To Computer

Nintendo Switch and Computer:
Connect your Nintendo Switch to a computer using a USB cable.
Plug the USB-C end of your cable into the Nintendo Switch charging port and the other end of the cable into the appropriate port on your computer.
►Step 7 – Incompatible Cable Error (Sidestep)
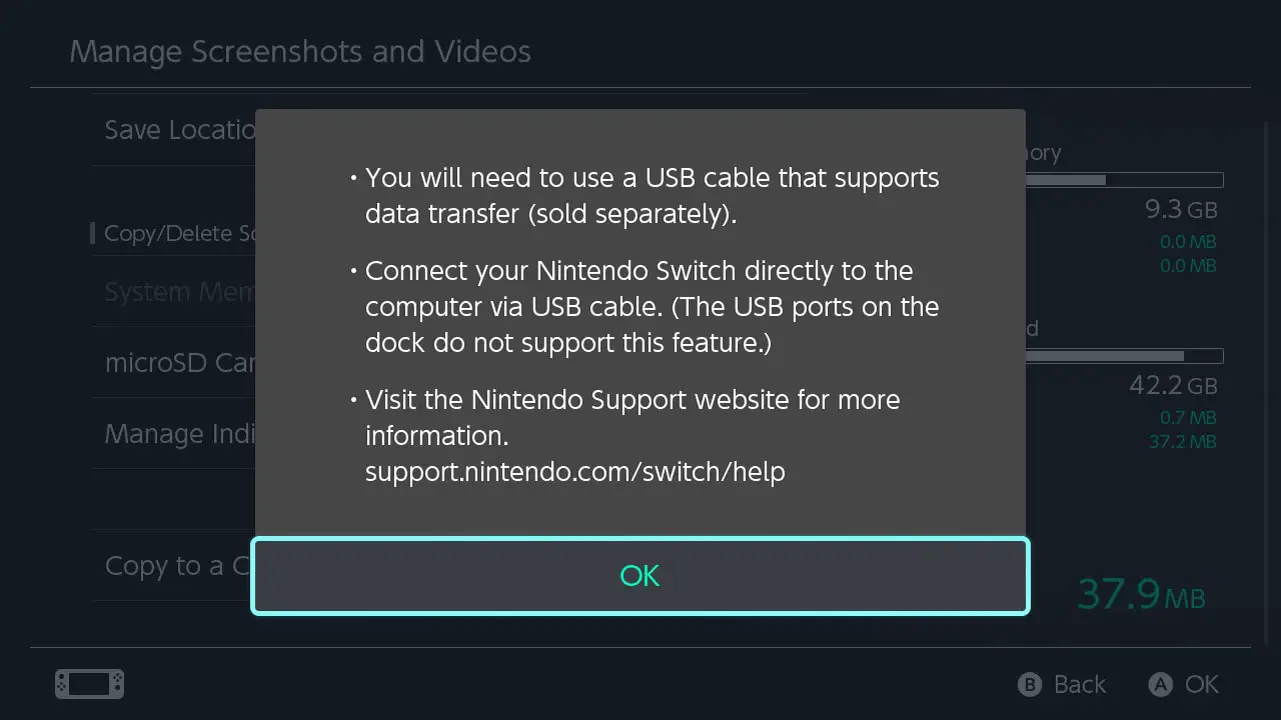
Nintendo Switch:
An error message will appear on your Nintendo Switch screen if your cable is not compatible or does not support data transfer.
You will need to use a USB cable with data transfer capabilities.
►Step 8 – Navigate To Connected Devices On PC
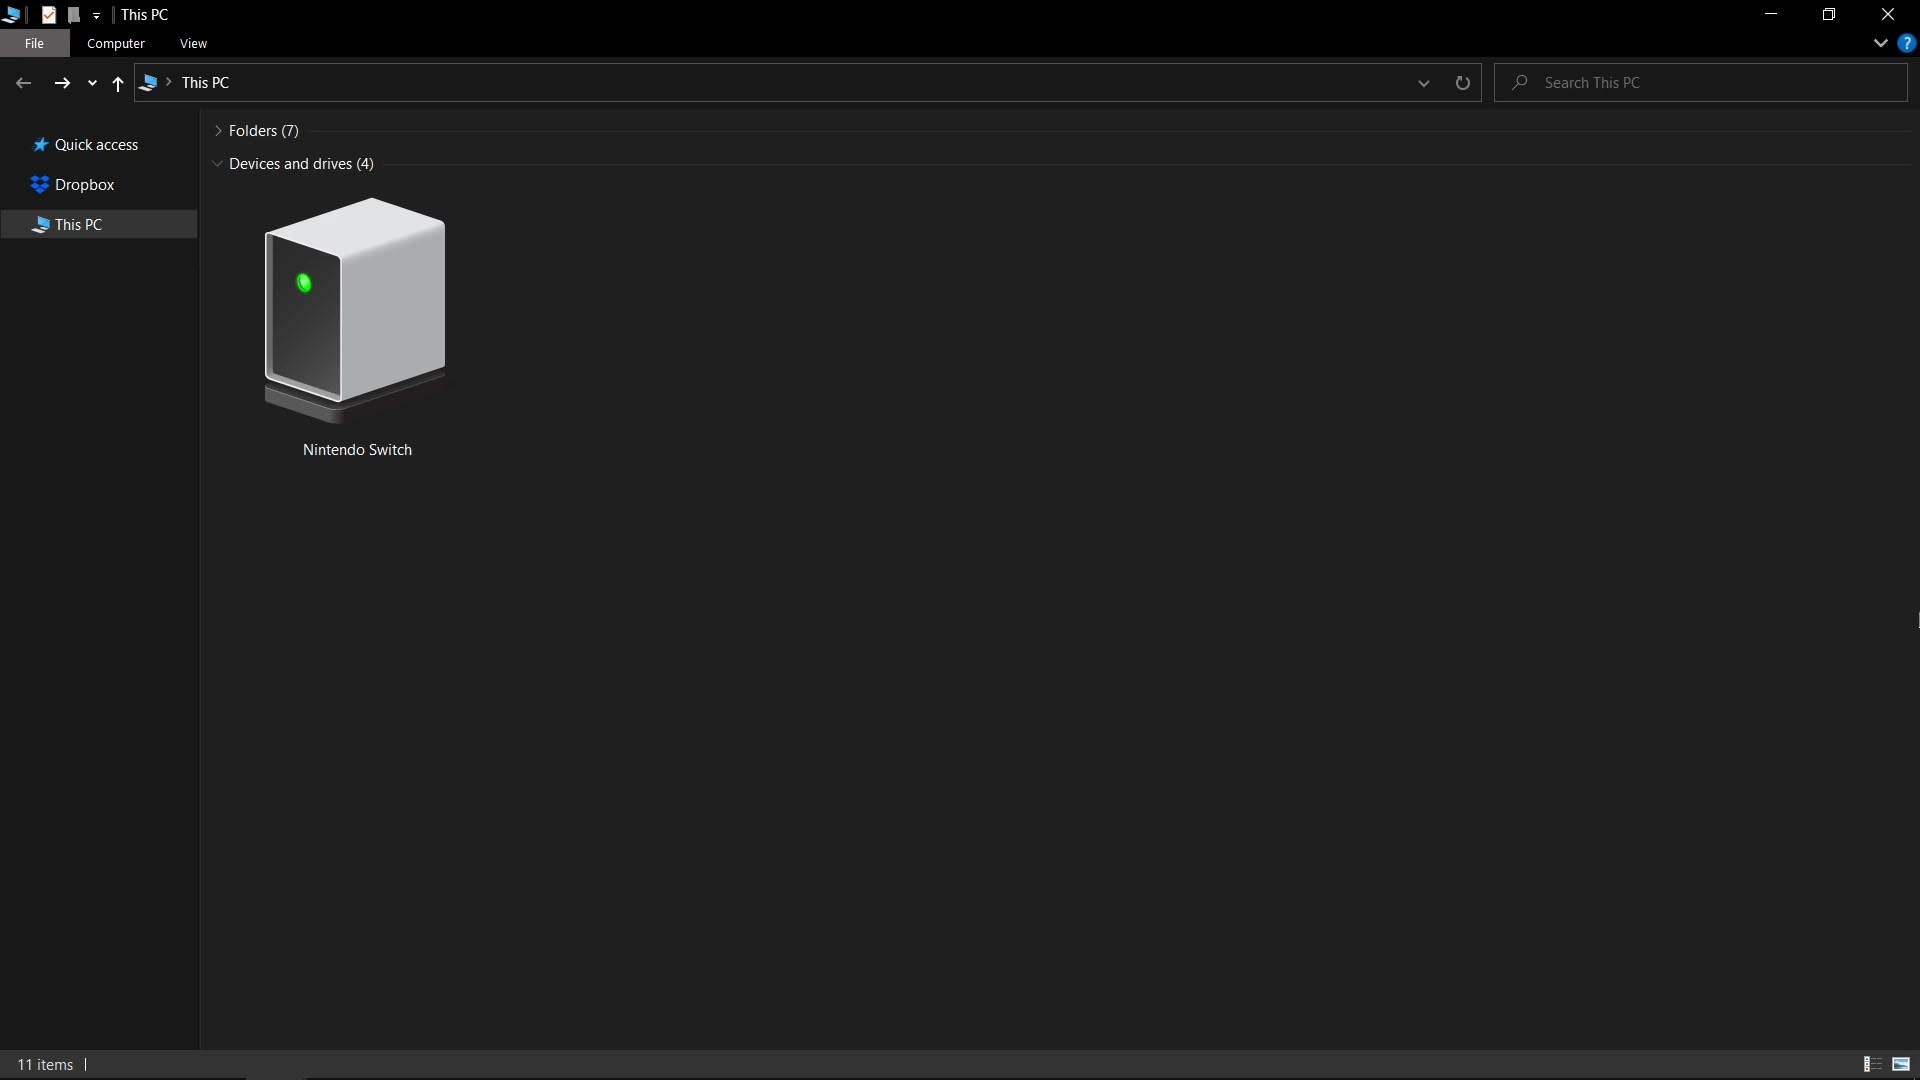
Computer:
Navigate to “This PC”, “My Computer”, and so forth on Windows PCs or equivalent for your operating system.
The computer will show you your Nintendo Switch once properly connected.
Double-click on the Nintendo Switch icon.
An Album icon will appear on screen.
Nintendo Switch:
Your Nintendo Switch screen will tell you that the device is connected once connected properly.
Keep your Nintendo Switch connected to your computer for the remainder of this process.
►Step 9 – Select Album
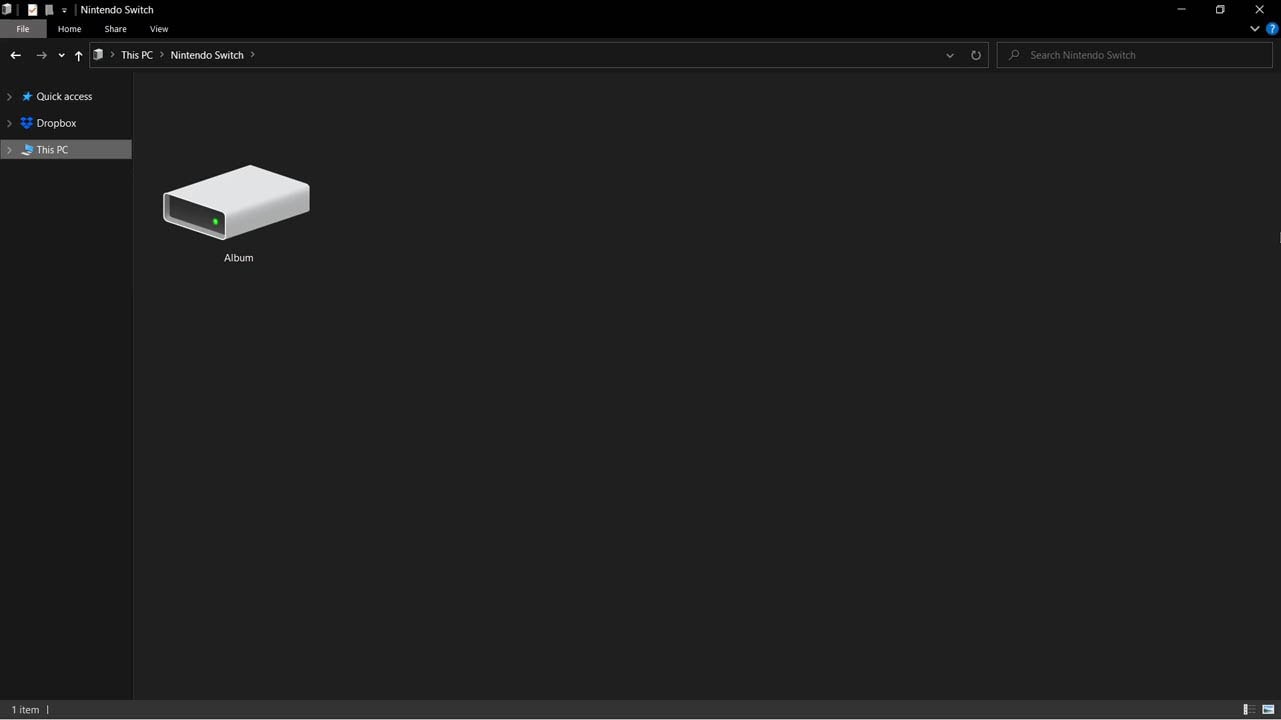
Computer:
Double-click on the Album icon.
Individual game folders (where any screenshots and videos you recorded are located) will appear on screen.
►Step 10 – Click On Game Folder
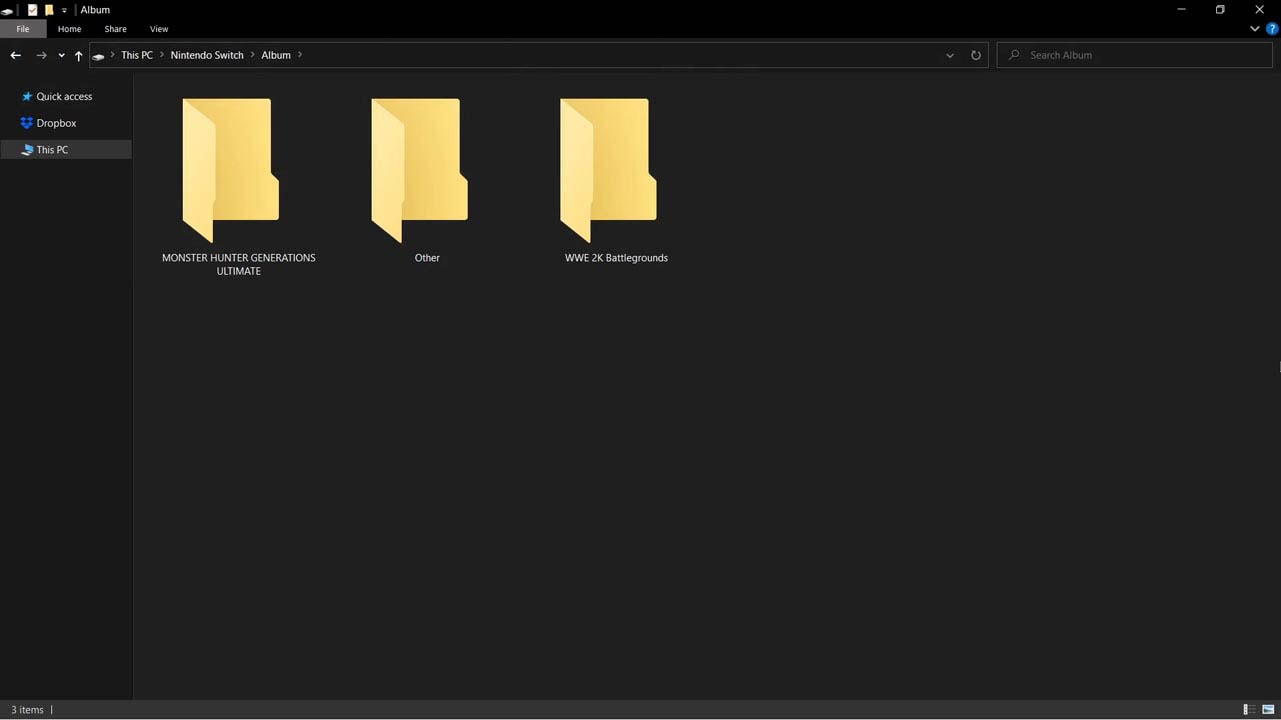
Computer:
Double-click on the game folder you wish to open.
►Step 11 – View Game Folder Contents
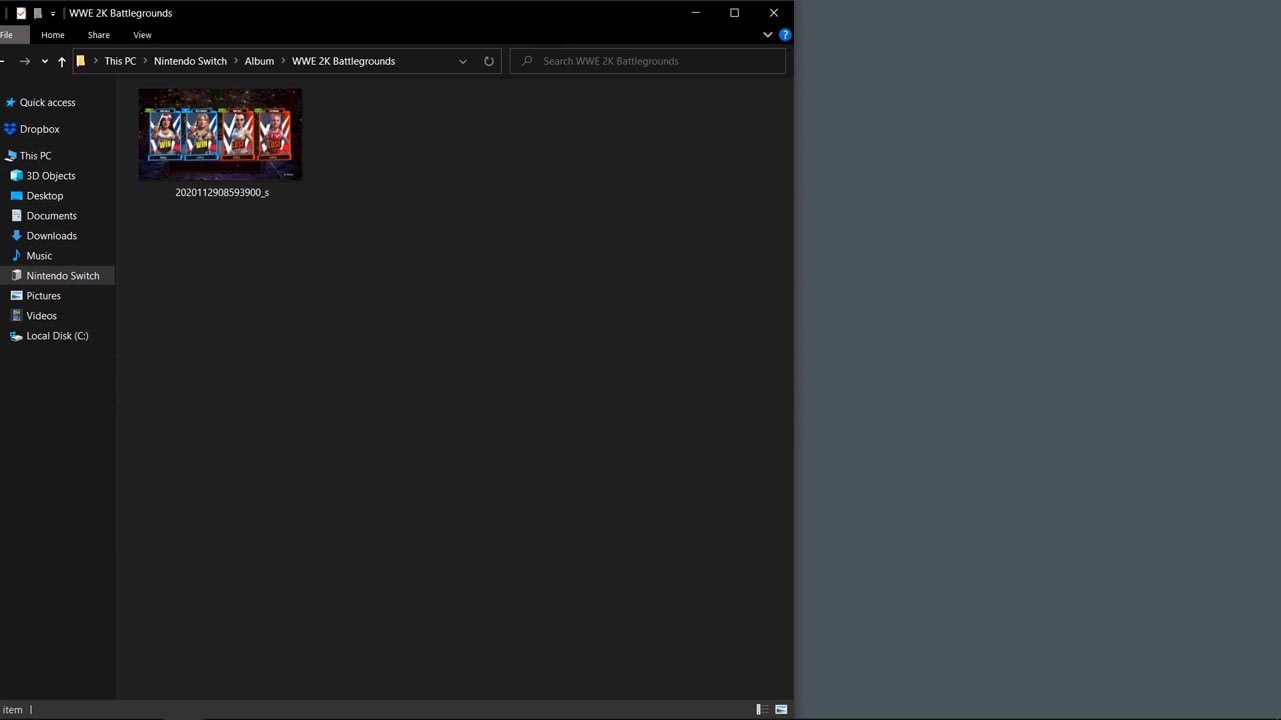
Computer:
The contents of the folder will appear.
►Step 12 – Copy Contents To Computer
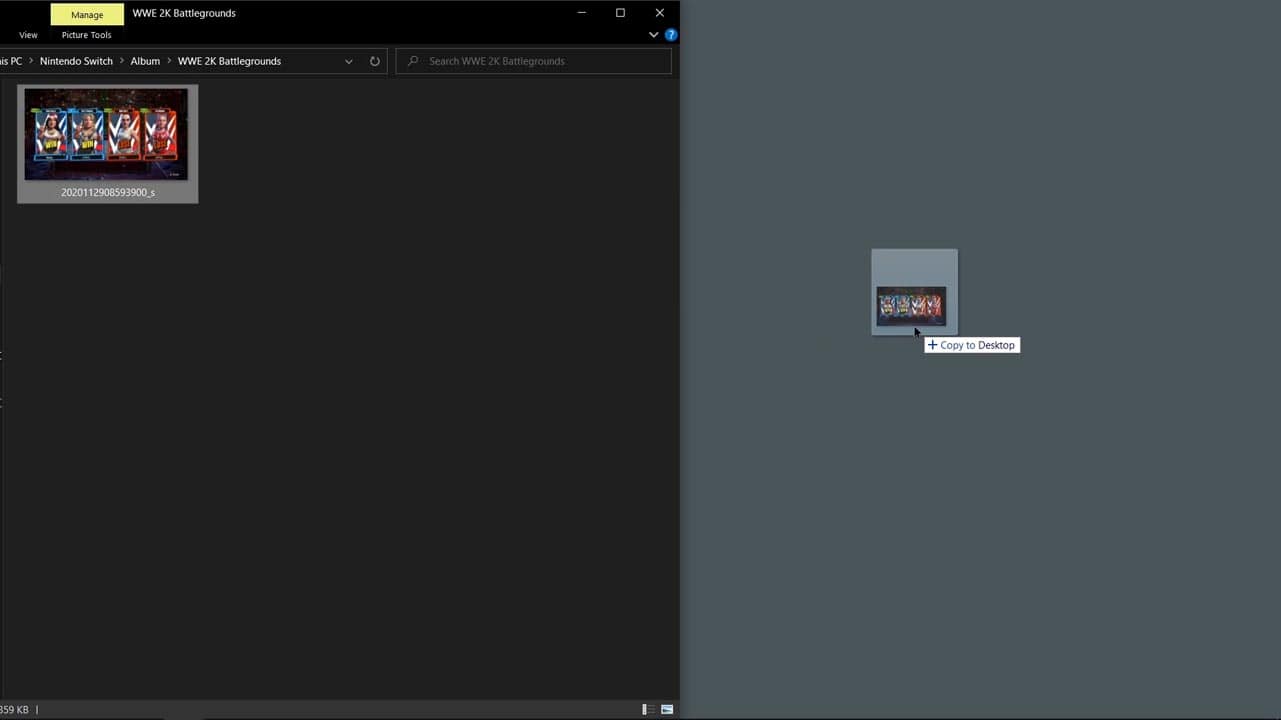
Computer:
Drag-and-drop (copy or cut and paste) the contents you want transferred onto your computer.
ATTENTION: You can only copy media content from your Nintendo Switch to the computer. You cannot delete media content off of your Nintendo Switch using the USB method.
►Step 13 – Wait For Contents To Copy
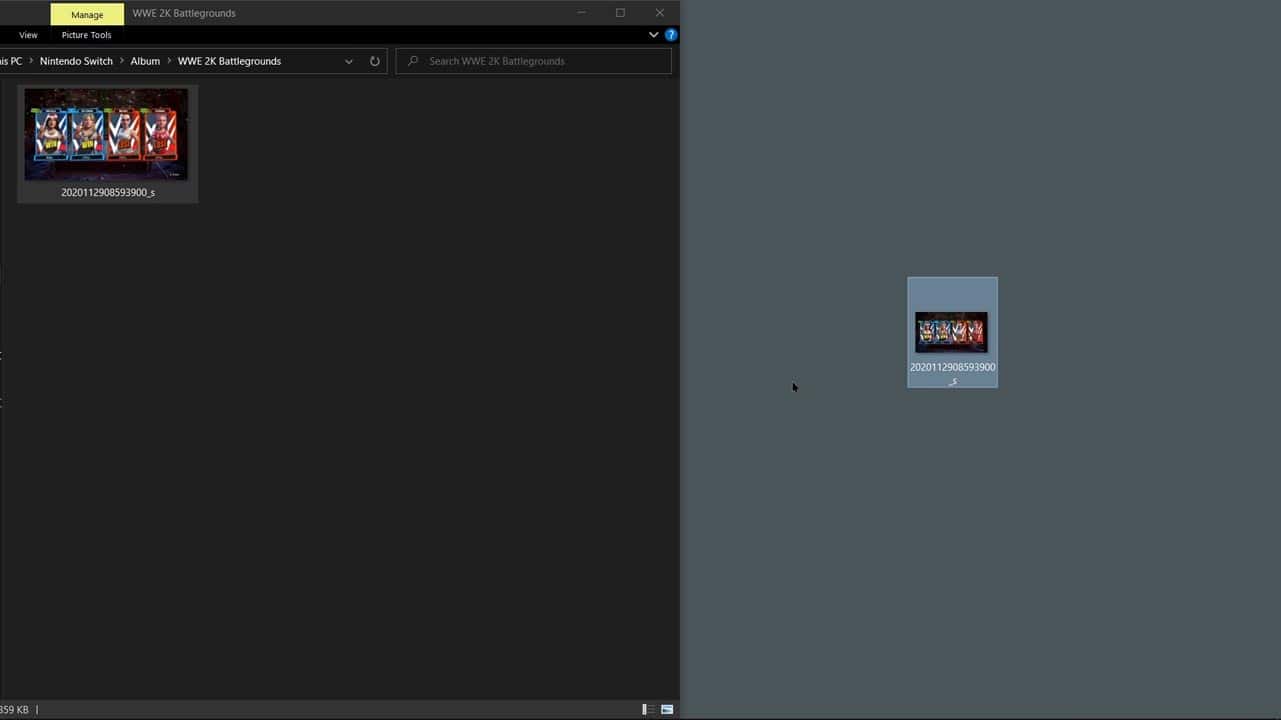
Computer:
Wait for the contents to be transferred from your Nintendo Switch to the computer.
This may take a while if you have a lot of screenshots and videos.
►Step 14 – View Contents On PC
Computer:
Once transferred, go through the screenshots and video content to make sure everything was transferred properly.
►Step 15 – Disconnect Nintendo Switch From PC
Nintendo Switch and Computer:
Disconnect the USB cable from your Nintendo Switch and computer once all data is done being transferred.
►Step 16 – Complete Transfer
Congratulations.
You transferred your Nintendo Switch media files to your computer like a pro.
Good job!
Read More Great Articles
Now you know how to transfer Nintendo Switch screenshots and videos from your Nintendo Switch to a PC Computer using the USB method.
Bookmark this site to stay up to date with even more Nintendo Switch guides, information, and more.
Check out all Nintendo related articles on Bucket List Games.
(Screenshots taken by me. Images sourced from product pages, websites, or social media and are credited appropriately. Logos, images, etc. belong to their respective owners. All information current at time of publication.)
SOURCE: Nintendo