Today, I’m going to explain to you how to solve the Nightwave Glassmaker Act 5 quest in Warframe. This is the final act in the Glassmaker storyline, so prepare yourself!
Warframe’s Nightwave: Series 3 Glassmaker Act 5 requires five clues to be found before heading into a platform area that must be traversed within sixty seconds. Then, a boss battle will occur that will test your might.
I will show you how to find each of the five clues, how to navigate the platform area, and how to defeat the god-like entity that awaits.
Use the links below if you are looking to solve Glassmaker’s other acts.
If you are interested in checking out the most popular gaming gift cards, you can find them by clicking here.
How To Solve Nightwave Glassmaker Guide Directory:
- How To Solve Glassmaker Act 1
- How To Solve Glassmaker Act 2
- How To Solve Glassmaker Act 3
- How To Solve Glassmaker Act 4
- How To Solve Glassmaker Act 5
What is Warframe?
Warframe is a free-to-play action game for Steam PC (computer), Nintendo Switch, PlayStation 4, and Xbox One.
Players take control of a powerful space ninja to complete quests, gather loot, craft weapons and gear all while battling ferocious foes across the universe.
This popular single and multiplayer game includes additional features that are free including a compelling ongoing storyline called Nightwave.
What is Nightwave: Series 3 Glassmaker?

Warframe’s Nightwave: Series 3 Glassmaker is an in-game event with on-going story elements split up in episodic “acts”.
- Each act is released over the course of the year and includes story and interactive elements.
- Each act requires the player to become a detective, find clues, and solve a mystery.
- Lastly, the player must navigate an open space by jumping on correct platforms in order to get to the goal within 60 seconds.
- Fail and the player must re-do the Act.
Nightwave: Series 3 Glassmaker began on May 12, 2020.
Why Should You Complete Nightwave: Series Glassmaker Act 5?
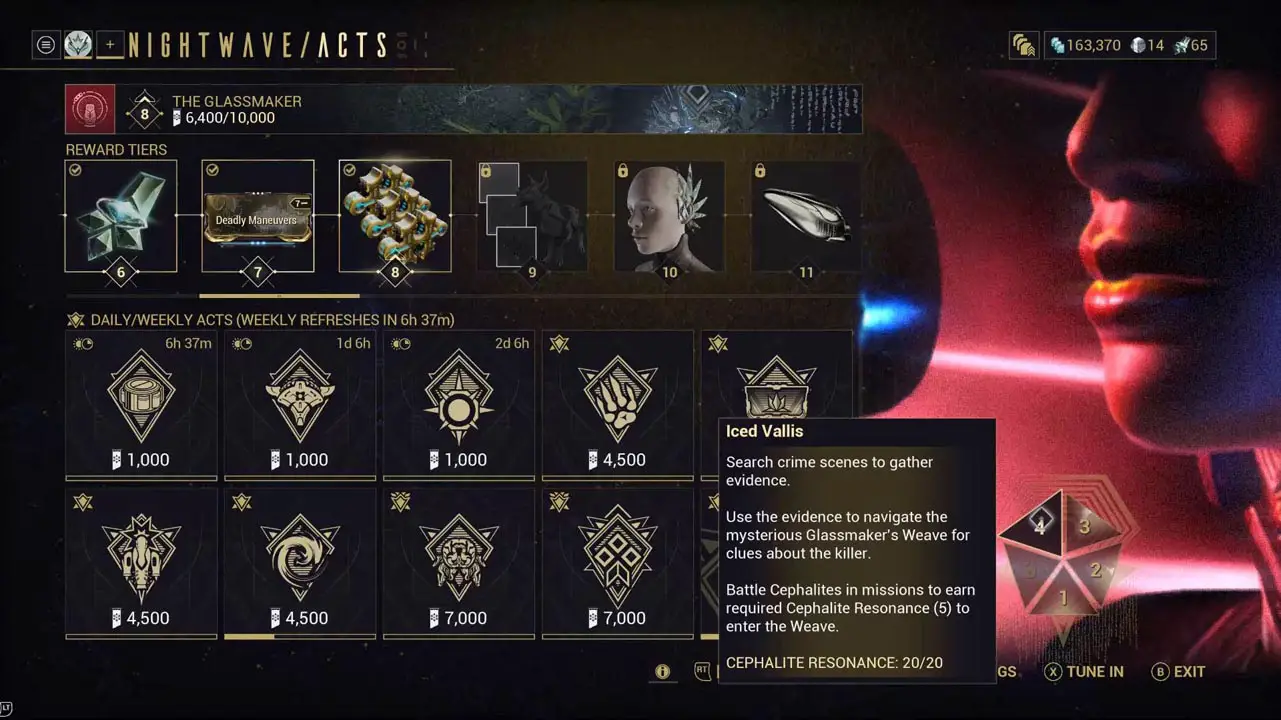
Completing a Nightwave act will give you a decent chunk of Nightwave Standing.
Collecting Nightwave Standing will increase your Nightwave Standing Rank.
Usually, 10,000 points of Nightwave Standing will increase your rank.
Each Rank increase will give you a reward. These rewards are usually desirable, uncommon, rare, or (at the very least) useful items such as cosmetics or mods.
And the best part? The rewards are entirely free.
BONUS: Glassmaker Act 5 Exclusive Rewards
Additionally, Nightwave Glassmaker Act 5 is the final act in the Glassmaker saga.
Completing it will grant you with 2 special items (more on these items later).
How To Solve Nightwave Glassmaker Act 5
Now, let’s go over how to complete Warframe’s Glassmaker Act 5 step-by-step.
1 – Acquire Cephalite Resonance
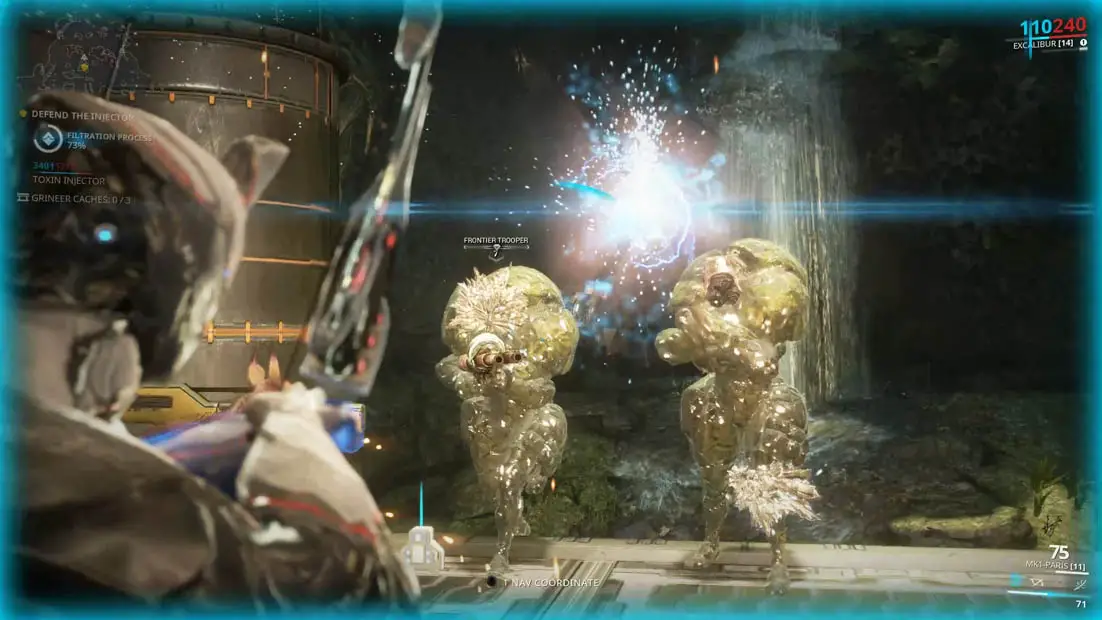
Cephalite Resonance is unique resource that certain enemies drop during Nightwave: Series 3 Glassmaker.
And 5 pieces of Cephalite Resonance are required to accept Glassmaker Act 5 (or any other acts you have yet to complete).
That is to say, 5 Cephalic Resonance will be used immediately upon accepting an Act.
So, make sure you are ready to solve the mystery ahead before accepting the Act.
❓ How do you acquire Cephalite Resonance?
You can acquire Cephalite Resonance by taking on most quests along the star chart on pretty much any planet.
During a quest, Nora (the in-game Nightwave radio host) will appear on screen to tell you that Resonance has been spotted nearby.
- Unique enemies covered in glass will appear.
- Defeat these enemies by hitting the glass shard on their body first to make them vulnerable.
- Then finish them off by any means in order to potentially collect Cephalite Resonance.
Keep in mind, you may only hold up to 20 Cephalite Resonance at one time.
2 – Accept Glassmaker Act 5 Quest On Your Ship
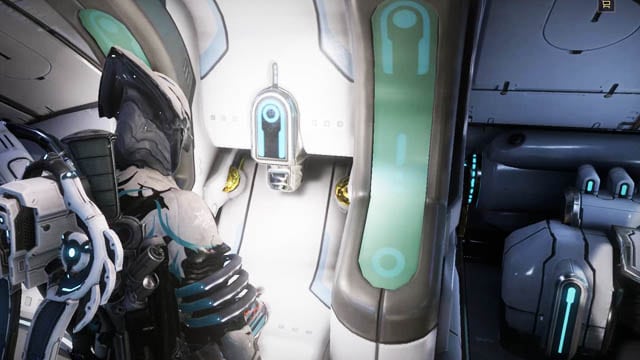
Walk to the Nightwave console on your ship. The console is default-located directly behind you and to the right if you are located at the front of your ship.
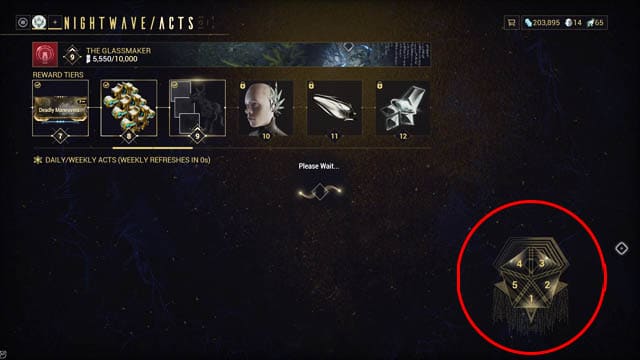
Then, select Glassmaker Act 5 on the bottom right portion of the screen.
Act 5 will start automatically the first time you interact with the console.
3 – Find the Five Clues
Now, you must find all five clues before you are able to move ahead.
Each clue is randomly placed throughout the map (from what I understand) so I recommend you look up and down and everywhere you can to find them.
I will now show you how each one looks like so you will have an idea of what they look like while you are searching for them.
REMINDER: You may not find these clues in the exact same order as I did but the clues will remain the same.
🔎CLUE A
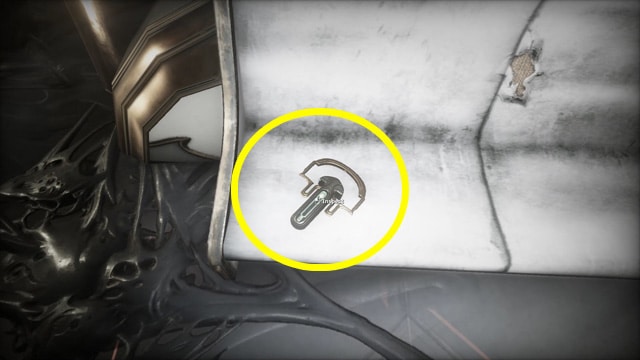
One clue is an amulet called a Weave Conduit.
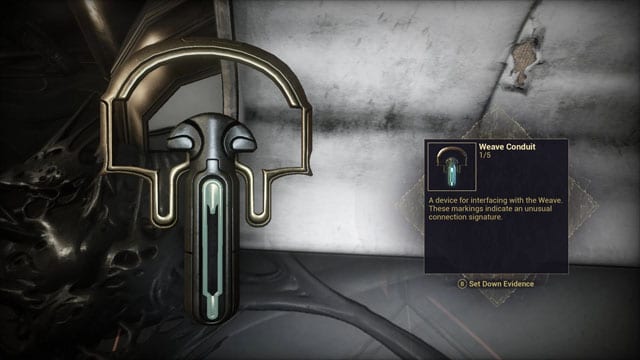
Interact with the Weave Conduit to get your clue.
Search Tip:
Look for a glimmering object.
I found the conduit resting on the chairs in the side room.
Clue to remember:
The specific shape of the Weave Conduit.
🔎CLUE B
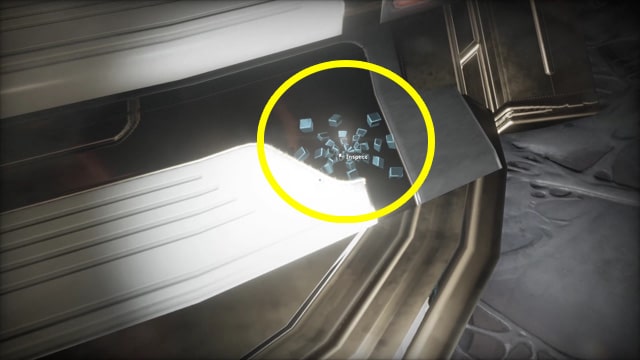
The next clue is a pile of glass shards.
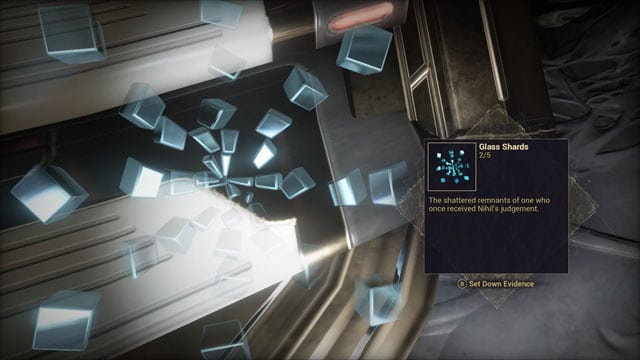
Interact with the glass shards and read the clue.
Search Tip:
Look for a pile of cube-shaped glimmering objects.
I found this clue lying on the ground near the second doorway inside the side room.
Clue to remember:
The glass shards shape and color.
🔎CLUE C
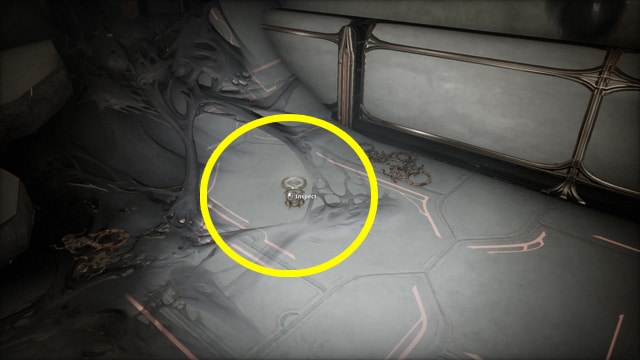
The next clue is a golden tablet called the Orokin Legem.
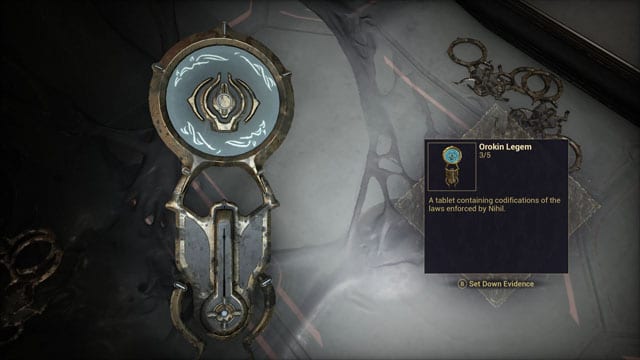
Interact with the Orokin Legem tablet to get your next clue.
Search tip:
Look for a golden, glimmering object.
I found this clue lying on the ground near the far right wall in relation to your starting position.
Clue to remember:
The shape of the design in the middle of the upper portion of the tablet.
🔎CLUE D
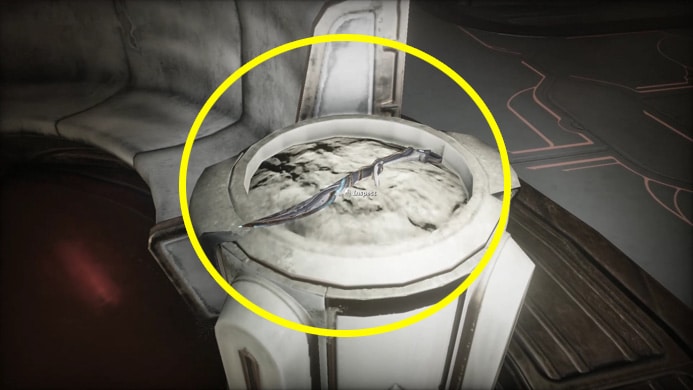
The next clue is a Ceremonial Weapon blade.
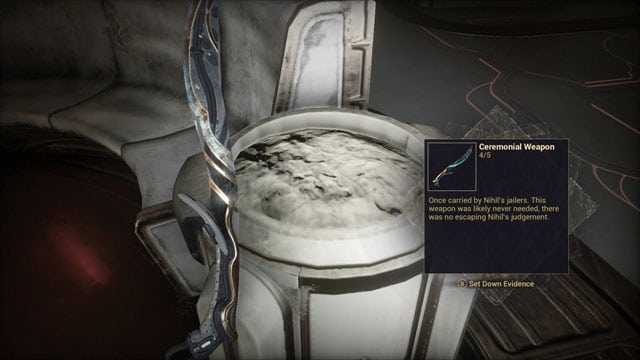
Interact with the Ceremonial Weapon to get your next clue.
Search tip:
Look for a glimmering long blade.
I found the Ceremonial Weapon lying on top of a garbage bin/ash tray near the center of the area.
Clue to remember:
The shape of the Ceremonial Weapon.
🔎CLUE E
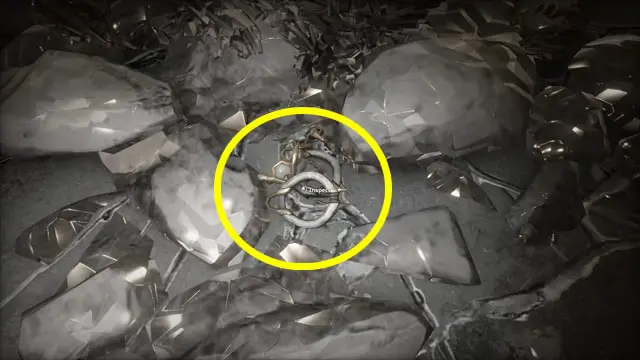
Golden metal restraints is your final clue.
This was the hardest clue for me to find since it blended in with the ground and glass shards on the floor.
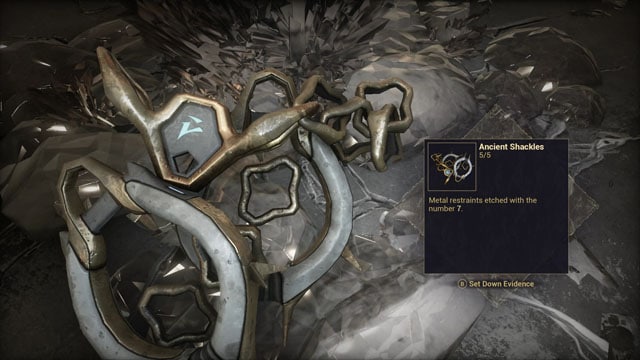
Interact with this metal restraints to get your final clue.
Search Tip:
Look for golden glimmering handcuffs.
I found these near the front of the room, below the statue, near a pile of glass shards on the ground.
Clue to remember:
The number 7.
–
Congratulations! You have all 5 clues to Glassmaker Act 5.
Now, let’s put them to use.
4 – Navigate the Platforms
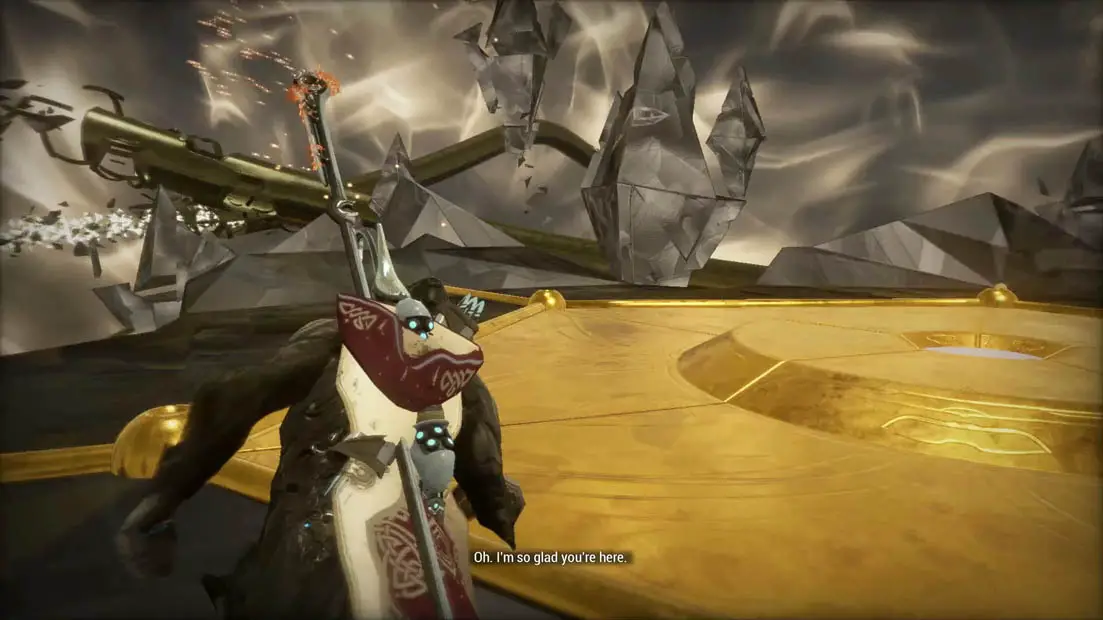
Welcome to the platform section of Act 5!
You’ll have 60 seconds to jump from one platform to the next until you reach the obelisk waiting at the end.
Unsuccessfully navigating the platforms will result in failure.
You’ll have to redo Act 5 if . . .
- you fall off a platform
- jump into the abyss
- time runs out
- or if you select the wrong platform
You’ll also need 5 additional Cephalite Resonance to re-accept the Act. Follow this guide word-for-word and you’ll do just fine.
REMINDER: The order of the platforms is random but the clues remain the same.
Now is the time to put the 5 clues we collected earlier to work.
PLATFORM 1
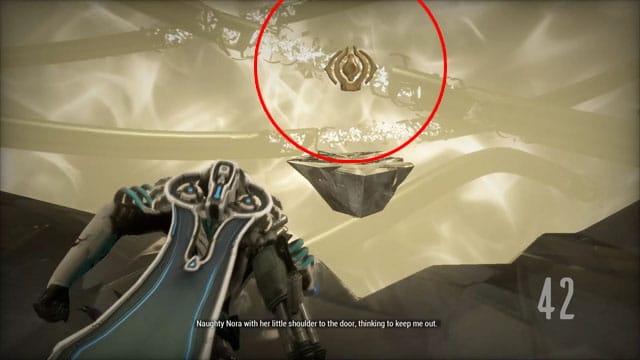
Jump on the platform with the Orokin Legem symbol.
PLATFORM 2
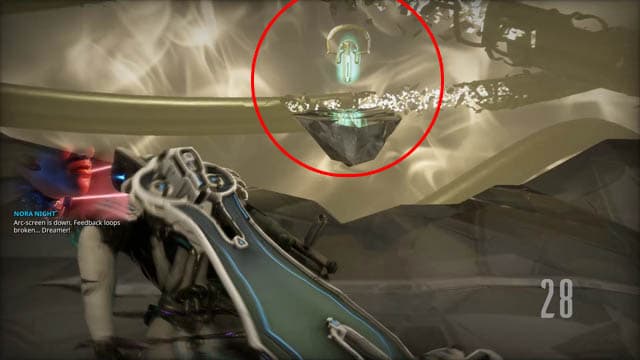
Jump on the platform with the Weave Conduit design.
PLATFORM 3
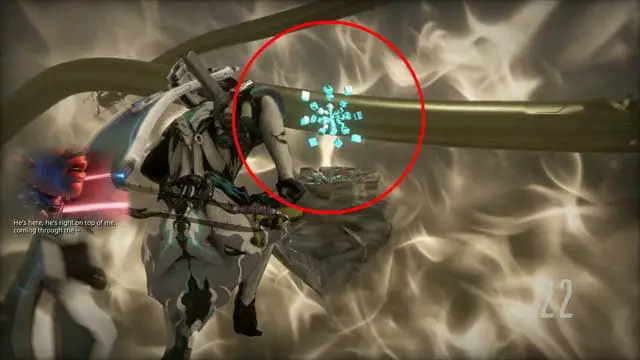
Jump on the platform with the Glass Shards.
PLATFORM 4
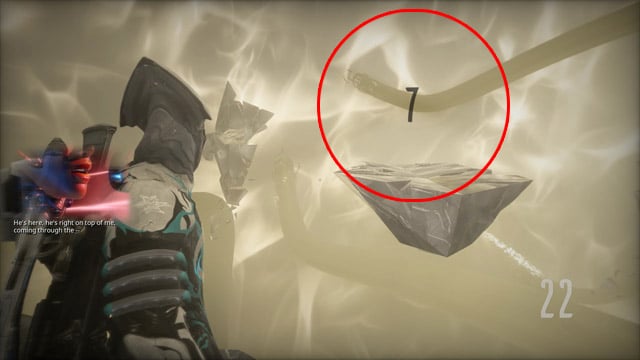
Jump on the platform with the number 7.
PLATFORM 5
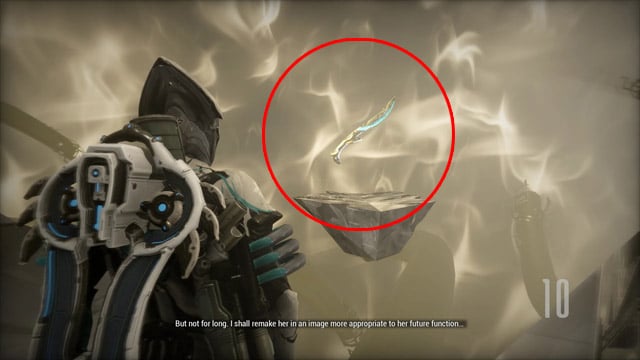
Jump on the platform with the Ceremonial Weapon hologram.
You’ve traversed all 5 platforms, but you’re not done yet!
OBELISK
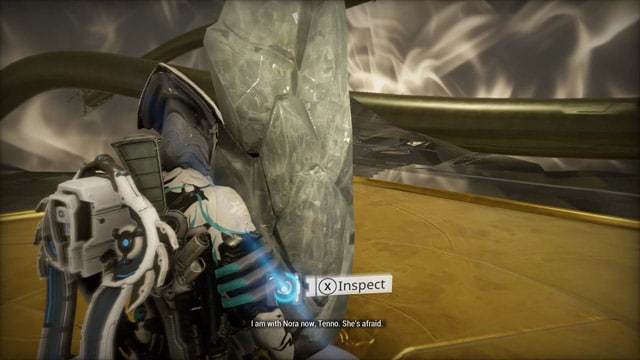
Maneuver to the final platform and interact with the obelisk at the center to face Nightwave: Series 3 Glassmaker Act 5’s epic boss encounter.
5 – How To Beat Warframe Glassmaker Act 5’s Boss

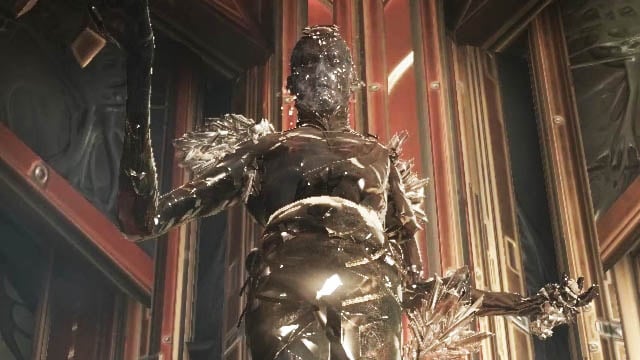
Now, let’s go over how to defeat Glassmaker Act 5’s Nihil, the Glassmaker.
Once you defeat Nihil, you will complete your mission and obtain rewards. But Nihil is a tricky one to beat.
There are three rounds but most tactics remain the same over the course of the fight.
The goal is to
- dodge the glass shards Nihil shoots from his head
- pick the glass shards up from the ground
- throw the glass shards at the floating crystals
- repeat until there are no floating crystals left
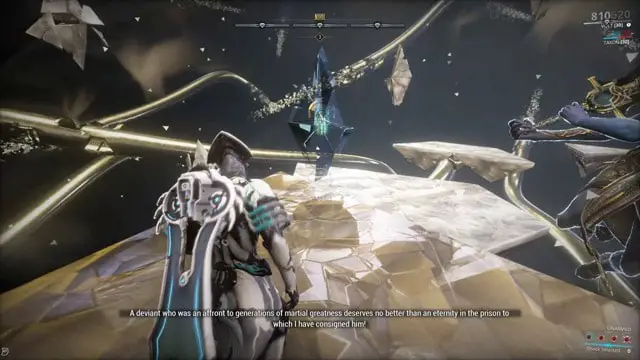
You cannot deal damage to Nihil unless a certain floating glass crystal has been destroyed.
I suggest destroying all of the floating crystals until you find the correct one.
Additionally, you won’t be able to use your standard weapons in this battle either.
Destroy the floating crystals by picking up glass shards Nihil shoots onto platforms; then, throw them at the floating crystals.
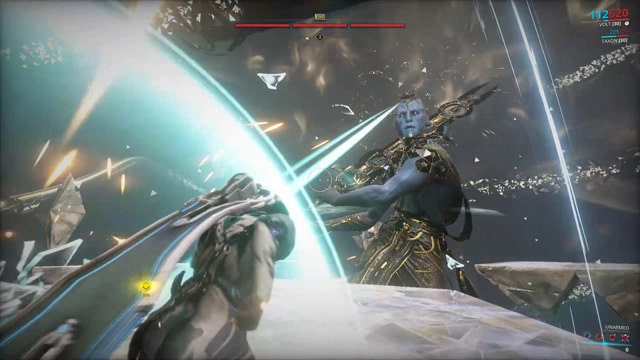
After the correct floating crystal has been destroyed, Nihil’s life bar (at the top of the screen) will shift to red. This is an indication that you can now hurt the god-like entity.
- The only way to hurt Nihil is by picking up the glass shards he shoots from his head and tossing them back at him.
You can bait the entity into throwing the shards at you by standing still and then dodging the shards.
The glass will remain on top of the platform for you to pick up and toss back at Nihil.
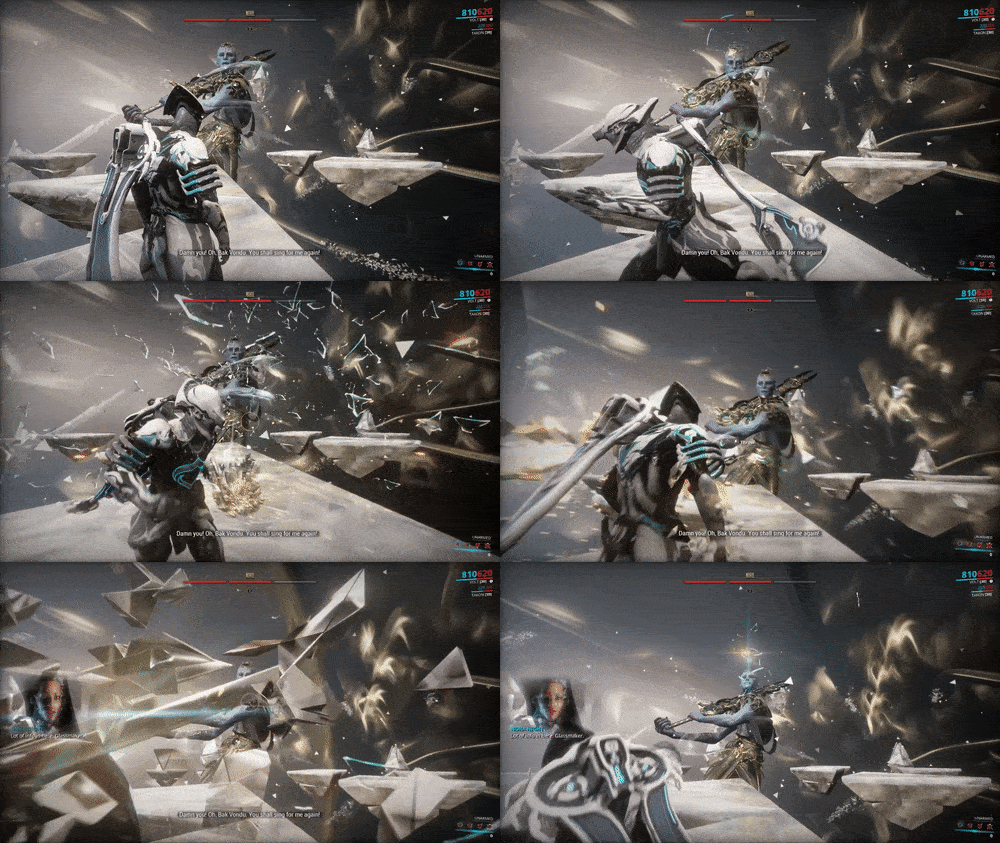
Pick up the glass shards and throw them at Nihil. Repeat this process a few times, while dodging Nihil’s sword attacks, to go to the next round.
If Nihil’s glass shards hit you, however, you will change color and slow down, allowing Nihil an opportunity to hit you with his sword.
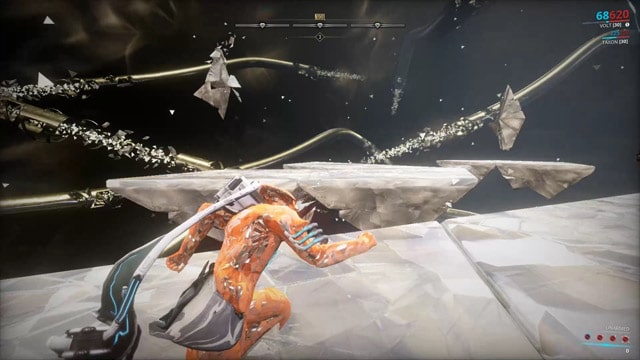
The slow down will only last a few seconds before wearing off.
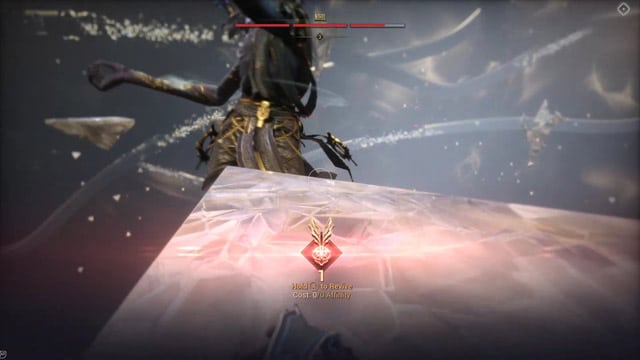
One hit from Nihil’s sword and you are dead. Die a certain amount of times and you have to restart the entire boss battle (along with needing to acquire and spend 5 additional Cephalite Resonance).
Nihil will swing his sword at you often. Dodge his attacks by jumping and gliding to other platforms.
If Nihil hits a platform with his sword (usually by performing a downward slash), that platform will be destroyed. Platforms will dwindle to just a few as the battle lingers on.
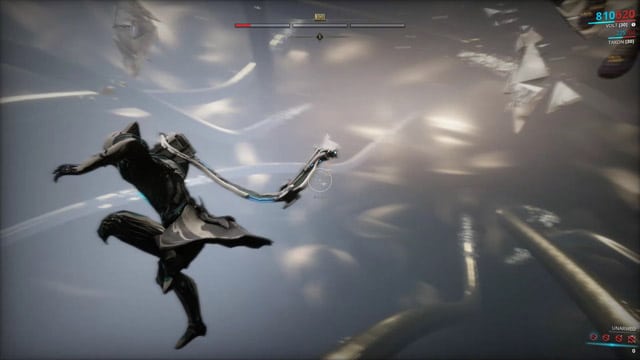
Keep in mind that you will not get penalized for jumping into the abyss.
Instead, you will restart on a temporary platform. Utilize this mechanic to dodge Nihil’s blows or just to restart from a better position, especially if there are few platforms remaining.
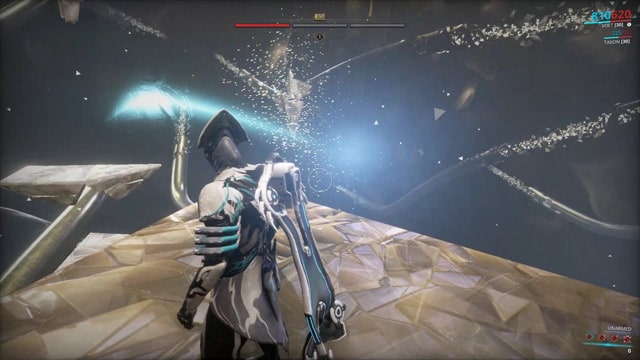
Nihil will also begin to teleport around the stage. Pay attention to the blue streak of energy he leaves behind to predict where he will end up.
Repeat dodging and throwing glass shards (first at the floating crystals then at Nihil) for the next two rounds in order to defeat the god-like being.
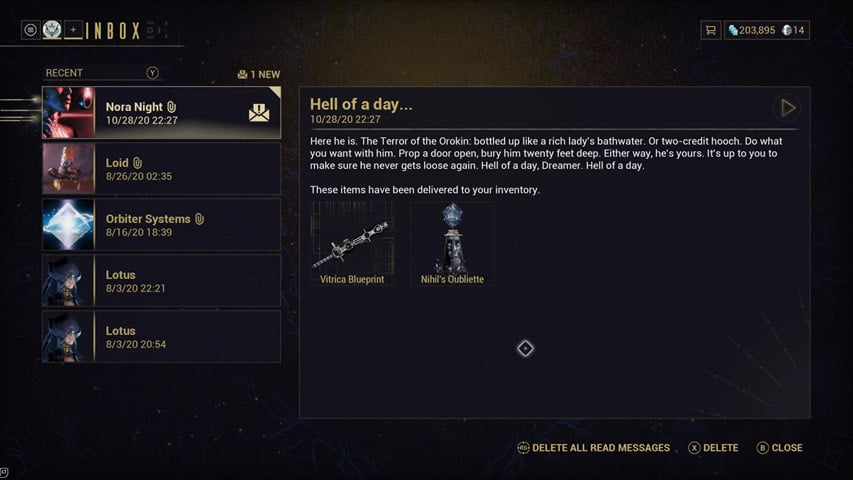
Then, reap your rewards. You will be given 2 items: the Vitrica Blueprint and Nihil’s Oubilette.
Vitrica is Nihil’s sword that turns enemies into glass while aim gliding and the Oubilette is a victory souvenir.
6 – Complete Glassmaker Act 5
Congratulations! You have successfully completed Nightwave Glassmaker Act 5.
Missed an Act? Don’t stop now!
- How To Solve Glassmaker Act 1
- How To Solve Glassmaker Act 2
- How To Solve Glassmaker Act 3
- How To Solve Glassmaker Act 4
- How To Solve Glassmaker Act 5
Continue solving the rest of Warframe’s acts by using the other guides on Bucket List Games.
Read More Great Articles
You now know how to solve Warframe’s Nightwave: Series 3 Glassmaker Act 5 detective quest, the final Glassmaker story mission.
Bookmark this site to stay up to date with even more Warframe guides.
Check out all Warframe related articles on Bucket List Games.
(Screenshots taken by me. Images sourced from product pages, websites, or social media and are credited appropriately. Logos, images, etc. belong to their respective owners. All information current at time of publication.)
SOURCE: Digital Extremes


