Today, I’ll be showing you how to change your default installation folder on Steam PC (Windows).
In order to change your Steam PC default installation folder, navigate to Steam Settings and select the Downloads option. Next, click on Steam Library Folders and then right click on the drive you want to make your new default install directory. Right click the drive name and choose Make Default Folder option.
Choosing your default installation directory on Steam is easy once you know how it’s done.
Continue reading if you want a detailed, step-by-step picture guide of the process.
If you are interested in checking out the most popular gaming gift cards, you can find them by clicking here.
Why Change Your Steam Default Install Location?
You’ll want to change your default install location for Steam applications and games if you want full control to where your content will be stored.
This is handy if you have:
- limited storage space
- a separate drive for your operating system
- multiple drives
- multiple drive partitions
- or even external drives
Steam allows you to change what drive/folder will be the default location in which games and applications are downloaded.
Learning how to change the default installation location is what we’ll be covering in this handy guide.
How To Change Steam PC Default Install Location
Changing your Steam default installation location for your downloadable content is a short process that only takes a minute or two to complete.
NOTE: You must have multiple drives and or folders already added/mounted/connected to your PC for this process to work.
STEP 1 – Navigate To Steam
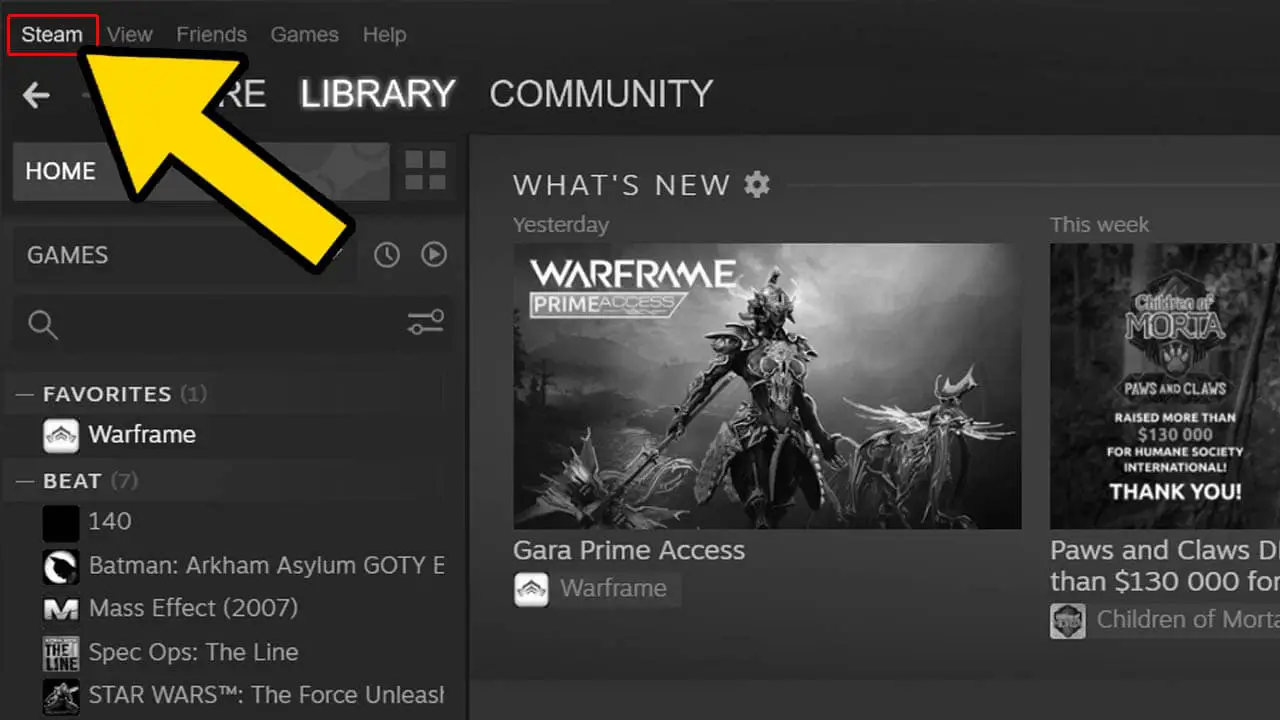
Open Steam and login with your account.
Left click Steam at the top left of the screen.
A list of options should appear.
STEP 2 – Select Settings
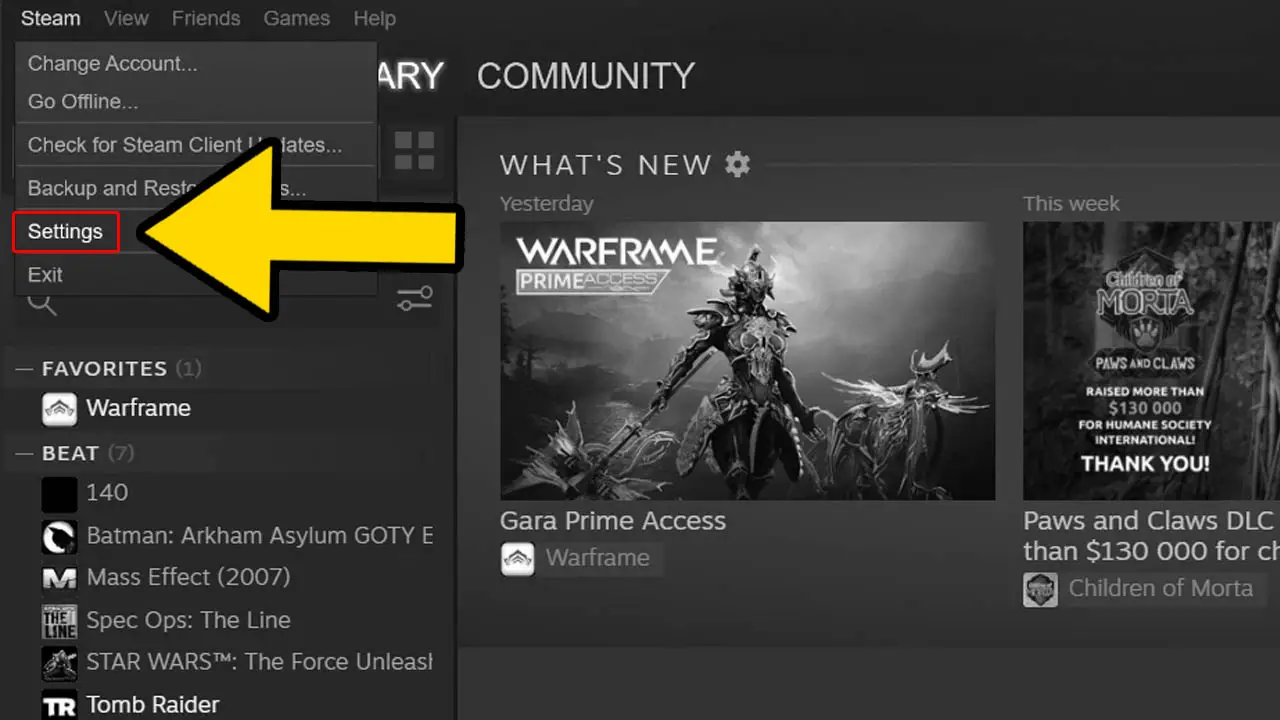
Select Settings from the list of options and left click.
A separate Settings window should appear on screen.
STEP 3 – Navigate To Downloads
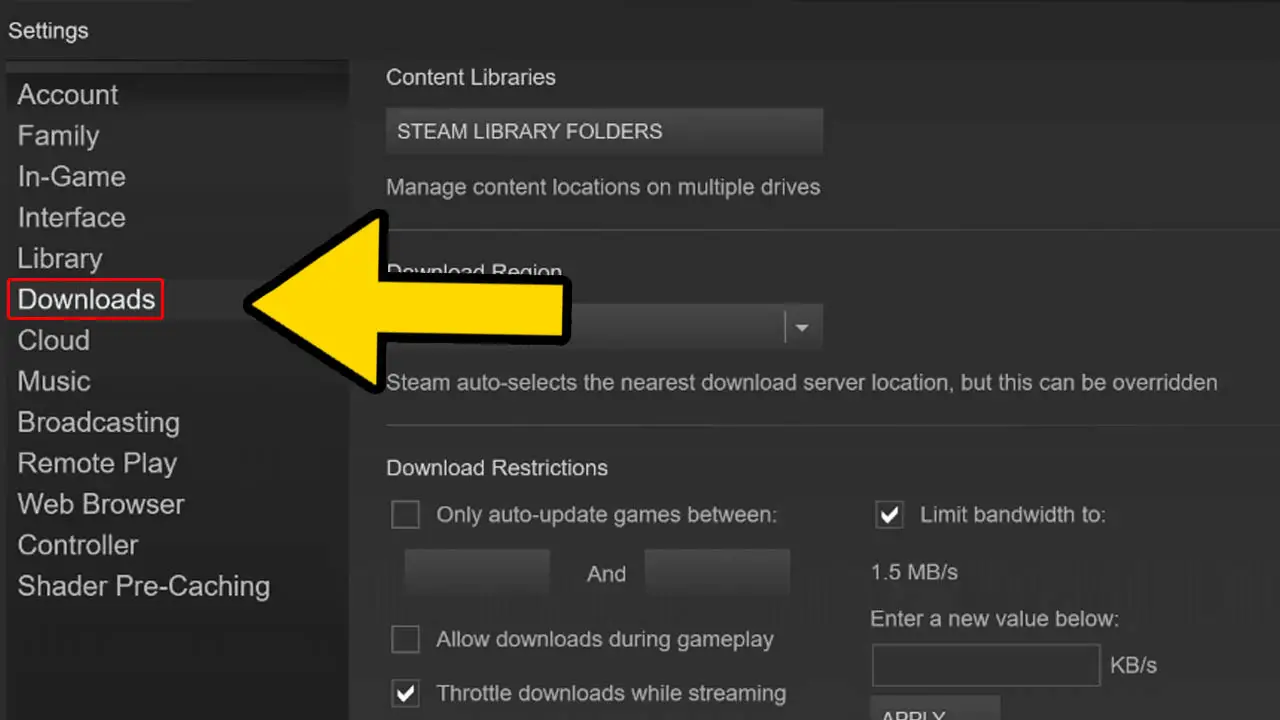
Left click Downloads from the list of Settings on the left.
The Downloads options should appear.
STEP 4 – Click Steam Library Folders

Left click the Steam Library Folders button in the Settings window.
A separate Steam Library Folders window should appear on screen.
STEP 5 – Right Click Folder
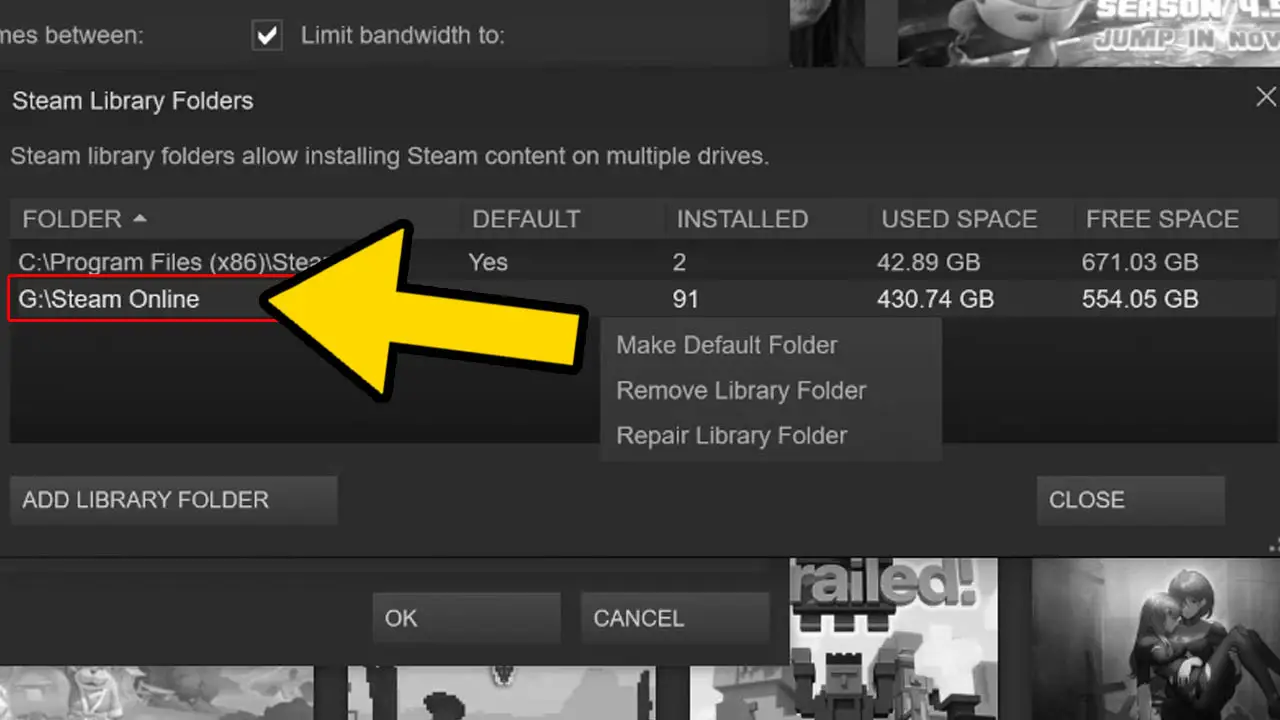
Right click the folder (drive) you want to make your new default installation location from the list of folders (drives) available.
A list of options should appear.
NOTE: You can check which drive is your current default install location by looking at the column called Default.
STEP 6 – Select Make Default Folder
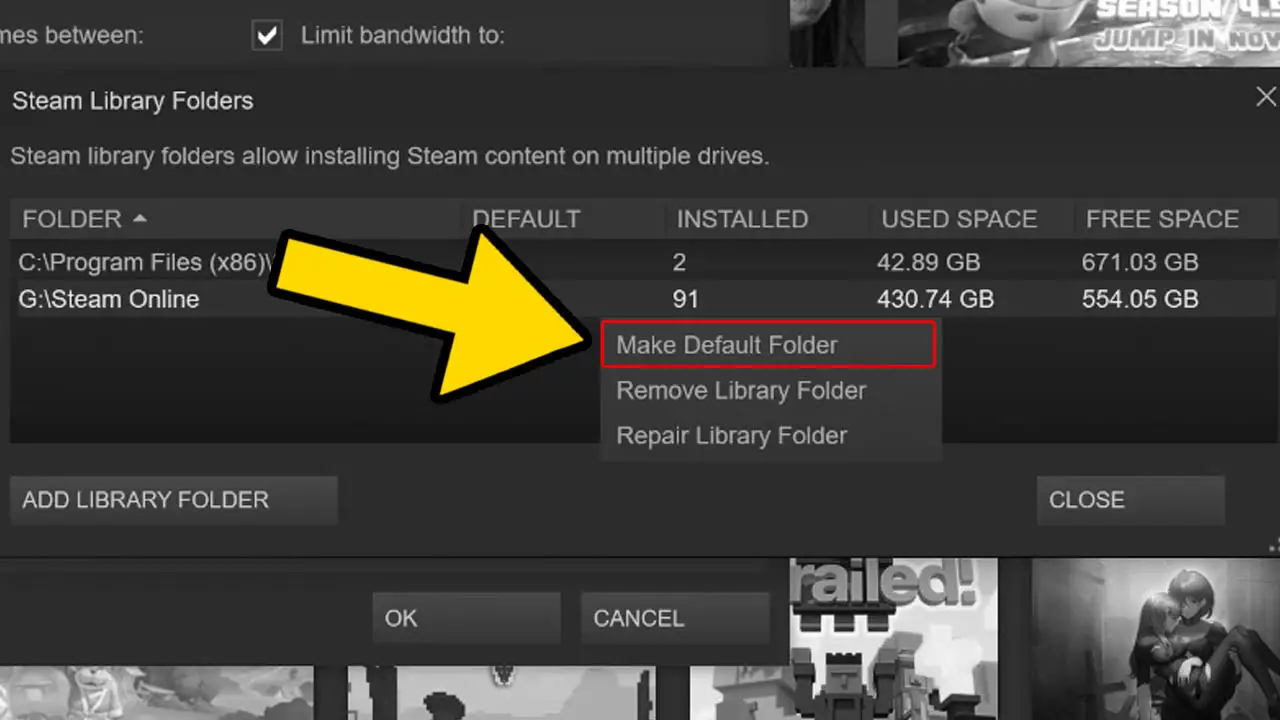
Select Make Default Folder option and left click.
The new folder (drive) will now be your default installation folder.
STEP 7 – Finish
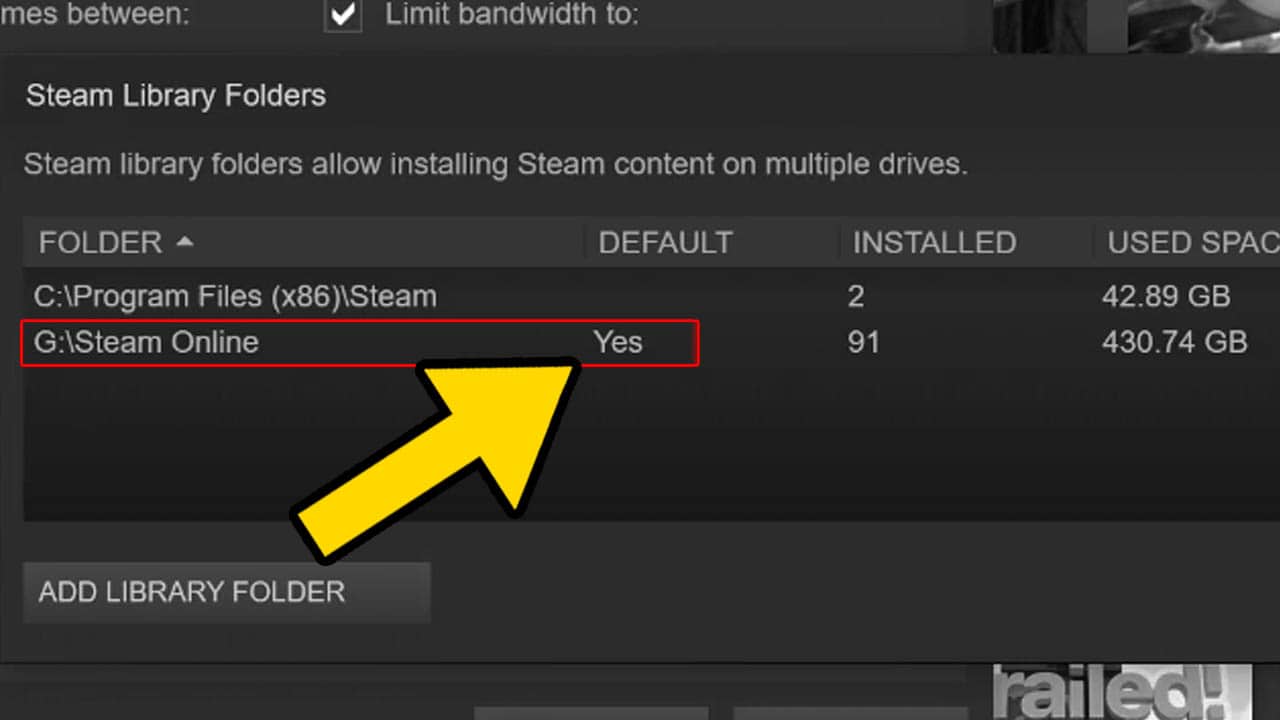
You have successfully learned how to change your default installation location on Steam PC (Windows).
Repeat this process to change your default drive whenever you like.
Read More Great Articles
Now you know how to change your default installation location on Steam PC.
Bookmark this site to stay up to date with even more Steam PC guides, information, and more.
Check out even more PC articles on Bucket List Games.
(Screenshots taken by me. Images sourced from product pages, websites, or social media and are credited appropriately. Logos, images, etc. belong to their respective owners. All information current at time of publication.)
SOURCE: Valve