We all want to start playing our shiny, new Nintendo Switch the moment we get our hands on it, but there are a couple of things we need to do first before we can start playing.
All new Nintendo Switch owners should start by applying a screen protector and charging their console before performing the first-time setup. Then, connect to the internet and update all controllers and software before playing a game.
Setting-up your Nintendo Switch the first time is quite simple once you know what you’re doing.
And today, I’ll be going over each of the 10 essential things you need to do with your new Nintendo Switch console.
If you’re interested in the most fun and popular games you should get first for Nintendo Switch, view the detailed guide I wrote about them by clicking here.
10 Things Nintendo Switch Owners Need To Do First
This post may contain Amazon affiliate links we earn from. Please assume all links are affiliate.
There are 10 things all Nintendo Switch owners should do first when they get their console.
This includes everything from applying a screen protector to connecting to the internet, creating necessary accounts, configuring social settings, and updating controllers and software before playing a game.
- Apply A Screen Protector
- Charge Your Console’s Battery
- Complete First-Time Setup
- Connect To WiFi (Don’t Skip This Step!)
- Create A Free Nintendo Account
- Link Nintendo Account With Switch Profile
- Configure Friends And Social Media Settings
- Update Connected Controllers
- Insert Or Download Game Then Update Software
- Play Your Game
I’ll be going over each one of these steps in detail. So let’s get started!
1) Apply A Screen Protector
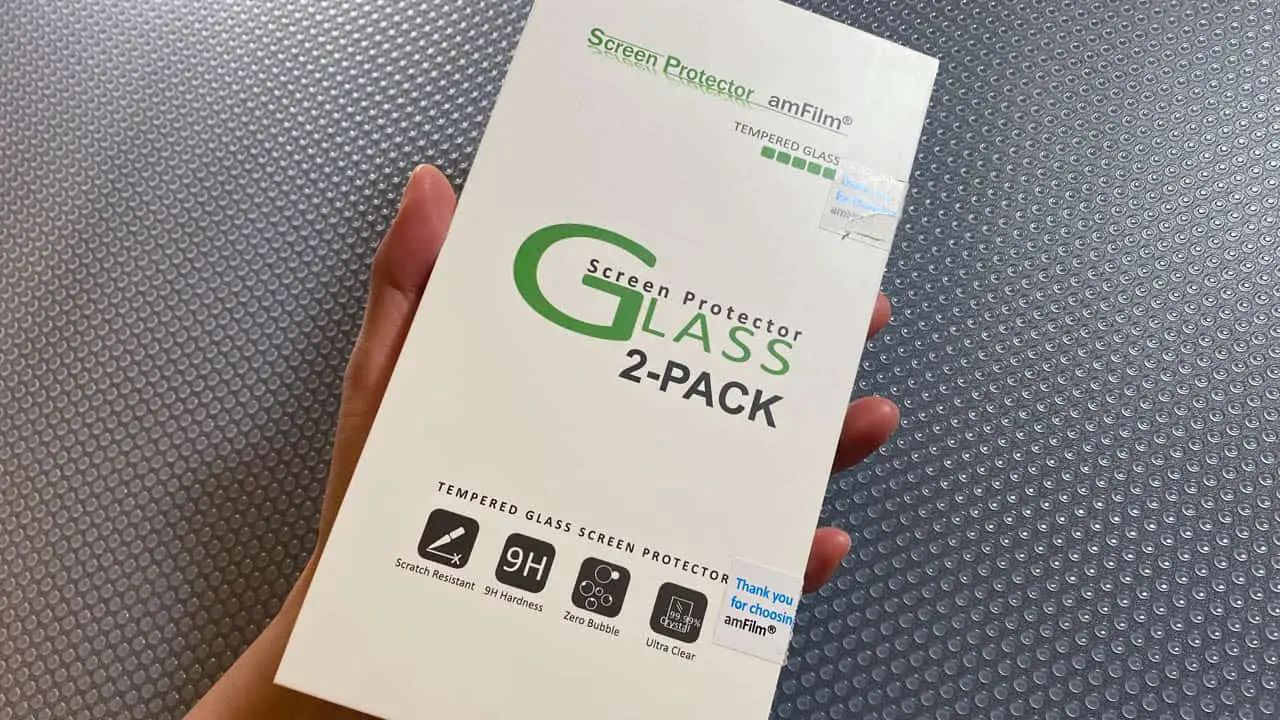
Apply a screen protector to your Nintendo Switch before you start playing. A screen protector guards the Nintendo Switch’s screen from scuffs, scrapes, dust, debris, and everyday damage. They’re easy to apply while being relatively inexpensive.
Apply a screen protector to your Nintendo Switch before you start playing
What Is A Screen Protector?
- A screen protector is a glass or plastic removable film that covers the Nintendo Screen to protect it from damage.
I implore you, do not touch your Nintendo Switch screen or turn it on before you purchase and apply your screen protector!
It’s tempting to start playing the moment you get your Nintendo Switch, but being patient and applying the protector first will help keep your Nintendo Switch screen safe for years to come.
If you want to know what screen protector my spouse and I personally use and recommend, view my detailed guide I wrote by clicking here.
For Nintendo Switch OLED Owners
The Nintendo Switch OLED comes with a pre-applied anti-scattering film on the screen to protect the screen from scattering.
This is very basic protection for the Nintendo Switch OLED screen.
Nintendo approves of applying an additional screen protector. Doing so will not damage the anti-scattering film already applied, either during application or removal.
2) Charge Your Console’s Battery
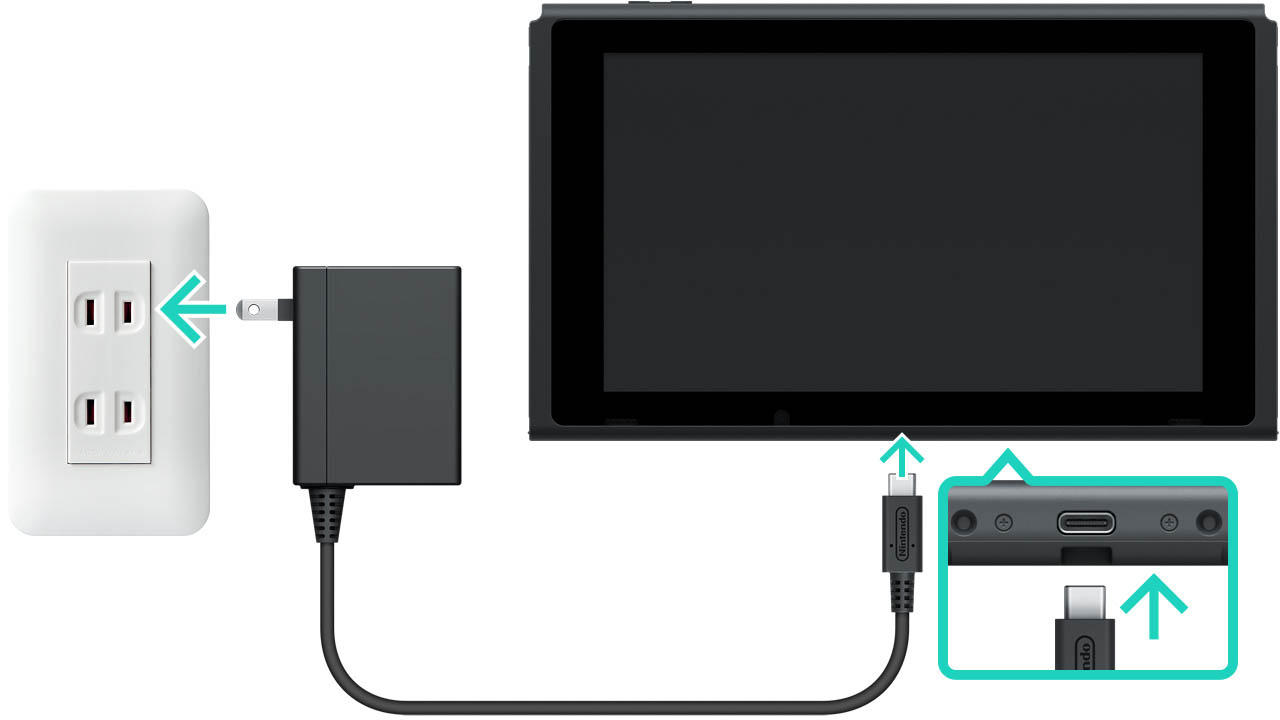
Connect your Nintendo Switch to a power outlet and charge your Nintendo Switch’s battery before you start playing games. Doing so is officially recommended by Nintendo and ensures your console has enough battery charge to complete setup, updates, and other basic functions.
charge your Nintendo Switch’s battery before you start playing
You do not want your Nintendo Switch to shut down during the middle of an essential task such as completing your first-time setup or creating a Nintendo Switch profile.
How To Charge Your Nintendo Switch Battery
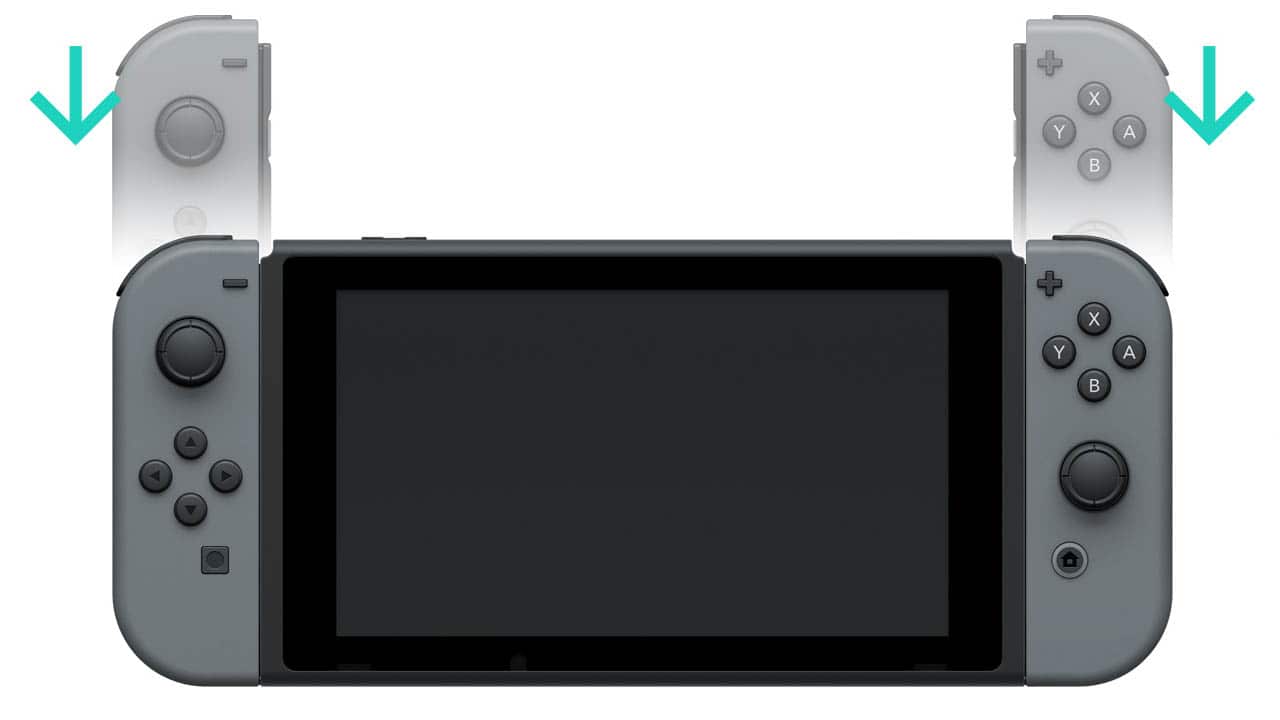
First, connect your Nintendo Switch Joy-Con controllers to the sides of your Nintendo Switch (Nintendo Switch Lite does not have Joy-Con controllers).
The Joy-Con controller batteries need to be charged as well and will receive charge when connected to the system.
Next, connect the USB-C end of the included Nintendo Switch AC adapter into the USB-C port on the bottom of your Nintendo Switch console, and then plug the AC adapter into a power outlet.
Alternatively, connect the USB-C end of the Nintendo Switch AC adapter into the USB-C port on the back of your Nintendo Switch Dock.
Slide your Nintendo Switch carefully into the Nintendo Switch Dock until it locks into place.
Your Nintendo Switch will begin charging. Turn on your console in an hour or two to begin the next step.
3) Complete First-Time Setup
The Nintendo Switch will automatically perform a first-time setup when turned-on for the first time. First-time setup only takes a few minutes and includes setting your time zone, language, and creating a Nintendo Switch profile to use.
Nintendo Switch’s first-time setup only takes a few minutes to complete
Specifically, the Nintendo Switch first-time setup will require you to
- set region and language settings
- your time zone
- create a Nintendo Switch profile (or transfer one)
- create a nickname and choose a profile icon
All of these settings can be changed later, so don’t worry if you don’t like your nickname or profile icon.
Additionally, setting parental controls is optional, but you can do so during the first-time setup.
You’ll also be prompted to setup your internet connection, which I implore you do not skip.
Finish your Nintendo Switch’s first-time setup up to move on to the most important step in this entire guide.
4) Connect To WiFi (Don’t Skip This Step!)
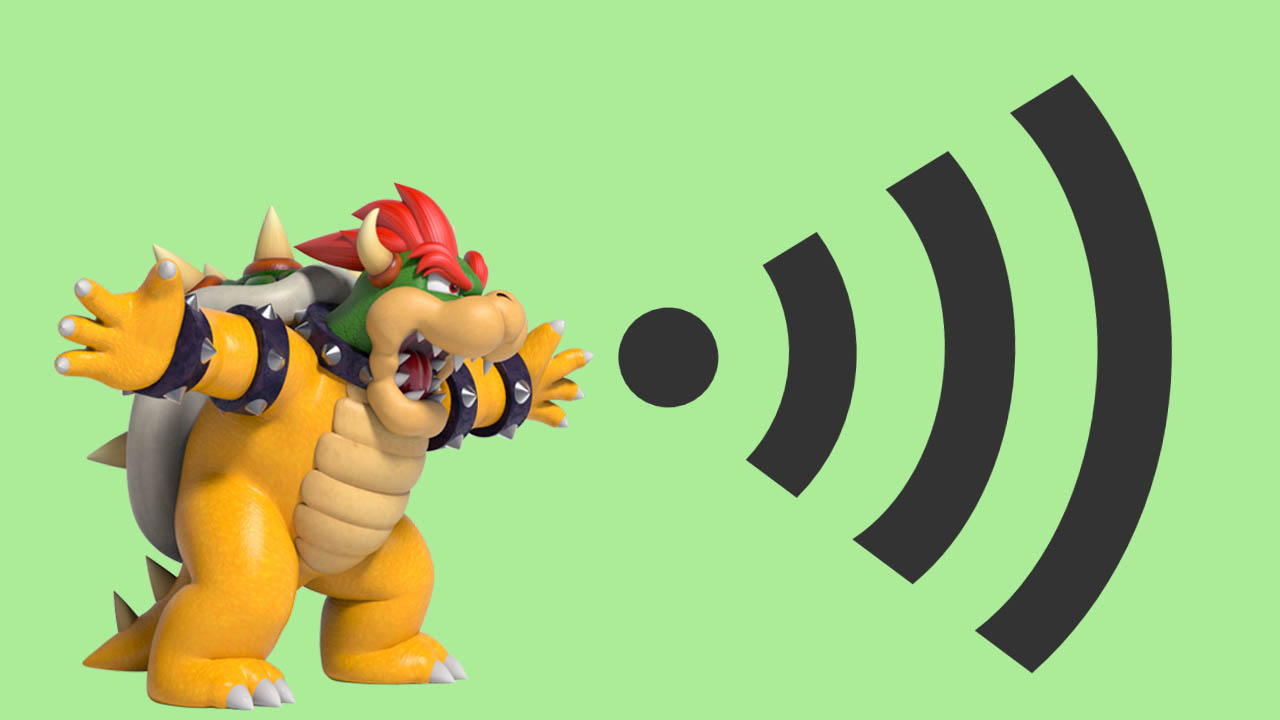
Connect the Nintendo Switch to the internet to gain access to online enabled features such as game downloads and online play. Nintendo Switch supports wired and wireless internet connections, and setting up only takes a few minutes.
Connect the Nintendo Switch to the internet to gain access to online enabled features
Connecting your Nintendo Switch to the internet is arguably the most important thing you need to do when you get your Nintendo Switch, so DO NOT skip this step.
Connect To The Internet To Access Nintendo Switch Online Features
Internet access provides your Nintendo Switch with a host of features, and the remaining pointers in this guide depend on doing so.
Social features, game updates, downloads, account creation, and multiplayer gaming all rely on connecting the Nintendo Switch to the internet.
You can do so during the Nintendo Switch’s first-time setup or after by using a wired or wireless connection.
How To Connect Nintendo Switch To WiFi
Connecting by WiFi is by far the quickest and best option, especially if you plan on using your Nintendo Switch in handheld mode at any time (wired connection is not an option for handheld play).
I wrote a detailed picture guide outlining the process of connecting a Nintendo Switch to WiFi, which you can view by clicking here.
5) Create A Free Nintendo Account
A free Nintendo Account must be created to get the most out of your Nintendo Switch. The account grants access to Nintendo Switch online features such as friends lists, online matchmaking, and the Nintendo Switch eShop digital store.
A free Nintendo Account is required to access Nintendo Switch’s online features
You cannot play Nintendo Switch games online or buy digital games if you do not have a Nintendo Account.
This may seem harsh, but it is actually consumer friendly and prevents you from losing access to previous purchases.
Having a Nintendo Account linked to your Nintendo Switch profile allows you to keep your purchases and accomplishments over time.
This is because purchases tie to a Nintendo Account, and not the Nintendo Switch console.
If you ever want to upgrade your Nintendo Switch or if your console ever breaks, you can easily move all of your past purchases and profiles to a new console by logging in with your Nintendo Account.
Creating a free Nintendo Account can be done by visiting a web browser and only takes a few minutes.
I wrote a detailed picture guide outlining the process of creating a free Nintendo Switch account, which you can view by clicking here.
6) Link Nintendo Account With Switch Profile
A Nintendo Switch profile must be linked to a Nintendo Account in order to access Nintendo Switch’s online suite of features, from adding and playing friends online to downloading software from the digital store. Linking a Nintendo Account can be done by visiting a Switch profile from the home menu.
link a Nintendo Switch profile and Nintendo Account to gain access to Nintendo Switch online features
Nintendo Switch online features that require a linked Nintendo Account include
- online play access
- adding friends
- playing online
- playing online with friends
- online play invites
- friend notifications and suggestions
- accessing the Nintendo Switch eShop
- purchasing games from the Nintendo Switch eShop
- downloading games from the Nintendo Switch eShop
- access to free games on the Nintendo Switch eShop
- Twitter and Facebook social media posting
- online voice chat through Nintendo Switch mobile app
Thankfully, linking a Nintendo Account to your Nintendo Switch profile is easy to do and takes 8 easy steps.
In order to connect a Nintendo Account to a Nintendo Switch profile
- create a Nintendo Switch profile during first-time setup
- select the Nintendo Switch profile in the top left corner of the HOME menu
- press A to be taken to that profile’s settings
- select the “Profile” tab
- highlight “Link Nintendo Account” on the right of the screen
- press A to be taken to account linkage screen
- sign in with your Nintendo Account information
- complete steps to link your profile and account
You’ll be able to take full advantage of your Nintendo Switch once you connected your Nintendo Account with your Nintendo Switch profile.
It only requires a few minutes to add robust online functionality that makes playing games on Nintendo Switch even more fun.
I Linked My Profile And Account But I Still Can’t Play Online. Help!
A Nintendo Switch Online Membership is required to play most games online. A membership can be bought in both individual and family plans with a family membership providing up to 8 players online access with costs savings.
Nintendo Switch online functionality includes free and paid services of which online matchmaking and play is considered a paid Nintendo Switch service.
Free features accessible once profile and accounts are linked include all online features except online play, cloud saves, and access to free games while subscribed.
These three features are only eligible with those that have an online plan (paid annually or monthly).
Nintendo Switch Online Features Recap
To recap, in order to access Nintendo Switch free online features you’ll need
- a Nintendo Switch profile
- a Nintendo Account linked to your Nintendo Switch profile
And in order to access premium features such as online play with friends and access to cloud saves and bonus games, you’ll need a Nintendo Switch profile and linked Nintendo Account plus
- a Nintendo Switch Online Membership
Having all three will allow you to play games such as Mario Kart, Animal Crossing, and Super Smash Bros online.
If you’re interested in the current price of a Nintendo Switch Online Individual Membership, view it on Amazon by clicking here.
And if you’re interested in the current price of a Nintendo Switch Online Family Membership, view it on Amazon by clicking here.
7) Configure Friends And Social Media Settings
Proper configuration of a Nintendo Switch profile’s friend and social media settings allows you to add friends based on different devices. You’ll also be able to post screenshots and videos to Twitter and Facebook directly from your Nintendo Switch.
post to Twitter and Facebook and add friends by configuring Nintendo Switch social settings
Setting-up your Nintendo Switch profile’s friend and social features is quite simple to do and only takes a minute or two.
How To Add Friends From Nintendo Switch Suggested Device Channels
- select your profile in the top left corner of the Nintendo Switch HOME menu
- press A to be taken to that profile’s settings
- select “Friend Suggestions” tab
- select a device/account on the right of the screen and sign-in to add eligible friends to your Nintendo Switch profile
How To Link Twitter And Facebook Accounts To Your Nintendo Switch Profile
- select your profile in the top left corner of the Nintendo Switch HOME menu
- press A to be taken to that profile’s settings
- select “User Settings” tab
- select “Posting to Social Media” under the “Album” category
- press A to be taken to a social media link page
- choose Twitter/Facebook and login with your social media account to connect it to your Nintendo Switch profile
You can add people who are your friends on Nintendo smartphone apps (such as Super Mario Run), Nintendo Switch owners who have also linked their Facebook or Twitter accounts, and friends you’ve had on Nintendo 3DS or Nintendo Wii U.
And with social media linked, you’ll be able to post your favorite screenshots and videos you’ve taken with the capture button onto Twitter or Facebook.
8) Update Connected Controllers
Updating Nintendo Switch controllers is possible and often overlooked as the feature is hidden in the Nintendo Switch’s settings. Yet doing so ensures Nintendo Switch controllers have up-to-date stability corrections as well as full compatibility with all Nintendo Switch consoles and games.
Update Nintendo Switch controllers to ensure maximum compatibility and stability with software and hardware
Nintendo Switch controllers that can be updated include
- any Nintendo Switch Joy-Con
- Nintendo Switch Pro Controller
Controller updates requires you to be connected to the internet and don’t take that long to perform (a few minutes at best depending on internet speed).
Also, Pro Controllers and Joy-Con controllers must either be connected to the Nintendo Switch or turned-on and within close proximity to be updated.
Nintendo often provides Nintendo Switch controller updates alongside operating system updates to ensure controllers work with the latest operating system firmware.
How To Update Nintendo Switch Controllers
- select “System Settings” app from the row at the bottom from the Nintendo Switch HOME menu
- press A to be taken to the System Settings
- select “Controllers and Sensors” from the list
- navigate to “Update Controllers” on the right side of the screen
- press A to check for and start downloading controller updates
I’ve spoken to my spouse and close friends who have all owned the Nintendo Switch for years.
And none of them even knew that updating Nintendo Switch controllers were possible. Even I forget sometimes, honestly.
If you can, just remember to update your controllers whenever you update your Nintendo Switch operating system.
Controller updates don’t happen too often but is essential to keeping your gameplay experience as smooth as possible.
9) Insert Or Download Game Then Update Software
In order to play a Nintendo Switch game, insert the game into the card slot or download a game from the digital store. Both physical and digital games may require a game update before it can be played.
Update software by connecting to internet and then launch a game. A prompt will appear if an update is available.
insert your game into the card slot or download your game from the digital store then update it before playing
Updates may take a few minutes to an hour depending on its size and your connection speed.
Most Nintendo Switch games can still be played without downloading the update. However, you won’t have access to the latest content and online games must be updated to be played online.
If a game has an update ready to download, a message will appear on screen asking you if you want to download it.
Optionally, you can manually check each Nintendo Switch game for game updates.
How To Manually Check For Nintendo Switch Game Updates
- select a game icon from the Nintendo Switch HOME menu
- press + to access the game’s Options screen
- select the “Software Update” tab
- select “Via the Internet” and check for updates
Remember to occasionally check for game updates if you own many games or keep your Nintendo Switch in airplane mode while it’s in sleep mode.
For example, I have hundreds of Nintendo Switch games. Updates are often overlooked which is why I make it a habit to manually check for game updates from time to time.
Want a visual guide helping your thorough the game update process?
I created a detailed picture guide for you that outlines on how to update Nintendo Switch games, which you can view by clicking here.
10) Play Your Game!
After applying your Nintendo Switch screen protector, charging your console, connecting to the Internet, and updating controllers and software, you are now ready to play games.
you’re now ready to play games on your Nintendo Switch
From Animal Crossing to Metroid Dread and Fortnite, the Nintendo Switch has over 6,000 games to play. Prepare for fun.
Acquire the game you want to play the most and then begin playing. Thankfully, launching a Nintendo Switch game is easy to do.
How To Launch Nintendo Switch Games And Software
From the Nintendo Switch HOME menu
- select a game icon from the icon row
- press A
- select your preferred Nintendo Switch profile
- the game will load and start
Enjoy playing games on your Nintendo Switch for hundreds (if not thousands) of hours like myself and millions of other happy gamers have done around the world.
Feel free to bookmark and come back here if you ever need a reminder of what to do with your Nintendo Switch.
And please share this article with other new Nintendo Switch owners.
With that said, happy gaming and I hope you have fun with your Nintendo Switch. It’s one of my favorite consoles ever, and I love knowing other people are enjoying their time with it as well.
If you’re interested in the most fun Nintendo Switch games to get first, view the detailed guide I wrote about some of my favorites by clicking here.
Other Articles To Enjoy
Hidden Costs And Fees Of Owning A Nintendo Switch
Do Nintendo Switch Games Ever Go On Sale?
How To Enable Dark Mode On Nintendo Switch
Read More Great Articles
Now you know the 10 essential things you need to do when you get a Nintendo Switch.
Bookmark this site to stay up to date with even more Nintendo guides, information, and more.
Check out all Nintendo related articles on Bucket List Games.
(Screenshots taken by me. Images sourced from product pages, websites, or social media and are credited appropriately. Logos, images, etc. belong to their respective owners. All information current at time of publication.)
SOURCE: Nintendo

?")
")

")
